Candidate Presentations, a customizable feature for submitting individual or groups of candidates, offers a distinctive approach. Rather than sending an email with attached resumes or files, the Candidate Presentation feature allows you to share a link for accessing comprehensive candidate information. This presentation encompasses field data, resumes, attachments, and a write-up, with the added functionality of setting link expiration and specifying document download permissions.
Click here to for a how to video on presentations. Click here for a step by step interactive course on presentations. Don’t have a login? Contact your administrator or reach out to PCRecruiter support for assistance.
Presenting a Single Candidate #
This functionality will allow you to send one candidate to one or multiple hiring authorities/contacts. This can be done from in the pipeline or from an individual name record.
In a pipeline #
- Open the Pipeline you wish to create a presentation from.
- Right click on the Candidate that needs to be presented.
- Select Create Presentation from the action menu.
- Follow presentation settings instructions below.
From a name record #
- Open the Name Record you wish to present.
- Choose Create Presentation from the action toolbar.
OR - Click on the presentations tab.
- Click the plus icon on the toolbar or the plus icon next to presentation.
Presentation Settings #
- Select the Template you wish to use, once the template is selected; all settings will populate according to how they are set up in the System menu.
- Name your presentation. This is to differentiate your presentations and allow you to search based on presentation name when viewing results.
- You can modify presentations settings on the fly, any changes made here will be specific to the current candidate presentation. (See Creating/Modifying Presentation Templates for more details on these settings)
Design Window #
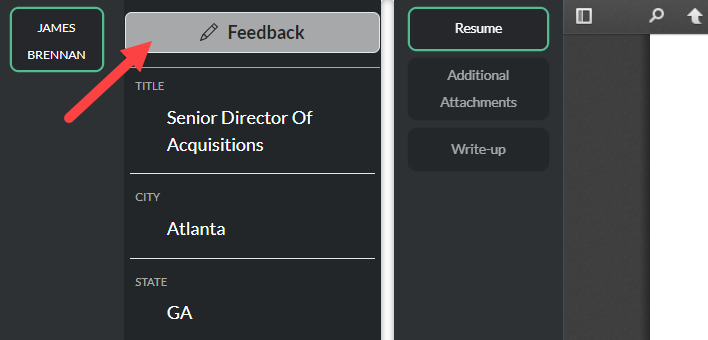
There are two areas in the Presentations Design Window; the Field Data column and the Attachments section. It is important to note that you can select “Edit Name Record” to make modifications to the field data for each candidate prior to sending. Once the presentation is sent, this button appears as the “Feedback” button to the recipient.
- Fields that are included in the template are selected to be included in the presentation; you may uncheck any fields that you do not want included in this particular presentation. Note: If a candidate does not have a value in a displayed field, ‘—–‘ will appear and that field will not be included in the presentation.
- Select the attachments you would like to include. Keep in mind, any resumes, global attachments, or profiles that were selected during setup will automatically be included. Note that if you have an attachment section with no attachments selected a yellow indicator will appear. This is to alert the sender that that section will not appear to the recipient when sent.
- Select Preview Presentation to ensure everything is correct (if desired)
- Choose Send Presentation
- If you have created a Presentation Form Letter, select the letter – it will populate in the box below and can be edited, if desired, prior to sending.
- Using the selector in the From field you may select the email address you wish to send this presentation from (Learn more about email aliases here)

- In the To field, enter desired recipients, each recipient will receive a blinded copy of the email.
- Note: At least 1 recipient must have a name record in PCR in order to send the presentation. If you would like to send to an email address other than the primary email field select the three dots for the desired recipient and then choose your alternate email address.

- If you would like to send the presentation to an email outside of PCR this must be done in the CC column. Just type in the email address you wish to send it to and click enter to add it.
- Note: At least 1 recipient must have a name record in PCR in order to send the presentation. If you would like to send to an email address other than the primary email field select the three dots for the desired recipient and then choose your alternate email address.
- Enter desired Subject
- If you did not create a Presentation form letter; enter your email body into the text box:
- Use Insert Fields to enter the following: Recipient First or Last Name, System fields (Username, Date, Signature, etc), and any profile link.
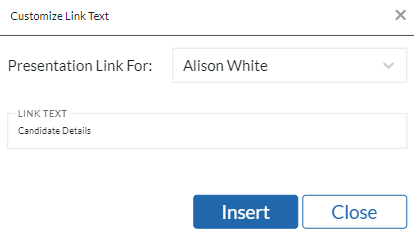
- Use Presentation Link insert field to include the link to the presentation. You must enter the text you would like displayed in this box before choosing insert.
10. Choose Send to send your presentation
Presenting Multiple Candidates #
You can present multiple candidates from a Pipeline, Rollup List, or a list of Search Results. This process is similar to individual presentations but allows you to send a presentation ‘packet’ or individual links. When selecting multiple candidate names they can be sent to one or multiple hiring authorities/contacts.
- Open the Pipeline, Rollup List, or Search Result list you wish to create a presentation from.
- Select the checkboxes of the records you wish to present.
- Choose Create Presentation from the action toolbar; this will open a new tab where you can modify your presentation prior to sending.
Presentation Settings #
- Select the Template you wish to use, once the template is selected; all settings will populate according to how they are set up in the System menu.
- Name your presentation. This is to differentiate your presentations and allow you to search based on presentation name when viewing results.
- Modify presentation settings as necessary, any changes made here will be specific to the current candidate presentation. (See Creating/Modifying Presentation Templates for more details on these settings)
Design Window #
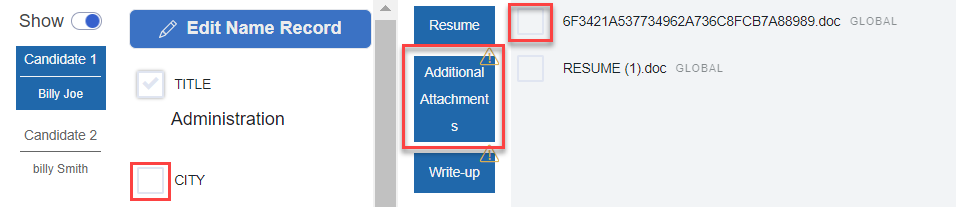
There are three areas in the design window; the candidate names column, field data column, and the attachments section. It is important to note that you can select “Edit Name Record” for each candidate to make modifications to the field data prior to sending. Once the presentation is sent, this button appears as the “Feedback” button to the recipient.
- Rearrange the order name records will appear in if sending as a packet. This can be done by dragging and dropping each button to its desired order. Once the presentation is sent, the candidate name will be hidden from this column.
- Fields that are included in the template are selected to be included in the presentation; you may uncheck any fields that you do not want included in this particular presentation. Note: If a candidate does not have a value in a displayed field, ‘—–‘ will appear and that field will not be included in the presentation.
- Select the attachments you would like to include. Keep in mind, any resumes, global attachments, or profiles that were selected during setup will automatically be included.
- Select Preview Presentation to ensure everything is correct (if desired)
- Choose Send Presentation
- If you have created a Presentation Form Letter, select the letter – it will populate in the box below and can be edited, if desired, prior to sending.
- Using the selector in the From field you may select the email address you wish to send this presentation from (Learn more about email alias’ here)
- In the To field, enter desired recipients, each recipient will receive a blinded copy of the email.
- The recipient must have a name record in PCR in order to send the person a presentation. If you would like to send to an email address other than the primary email field, select the three dots for the desired recipient and then choose an alternate email address.
- Enter desired Subject
- If you did not create a Presentation form letter; enter your email body into the text box:
- Use Insert Fields to enter the following: Recipient First or Last Name, System fields (Username, Date, Signature, etc), and any profile link.
- Click Presentation Link to include the link to the presentation. You can choose “Presentation Packet” to have one link in the email which will display all of the candidates. Or you can select each name from the dropdown to insert the links into the email individually (you must include all selected names in order to send).
- Choose Send to send your presentation
Receiving Presentations #
Viewing Presentations #
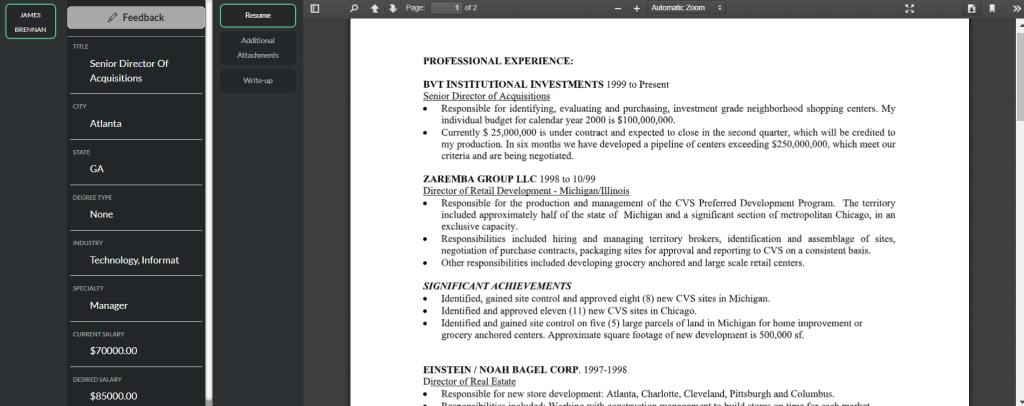
When a recipient receives a presentation email, they will be able to select the presentation link to open the Candidate Presentation. Once here, they can toggle between the presented candidate and view their various attachment sections with ease. If multiple attachments were selected within the same attachments tab, they will automatically be combined into one PDF.
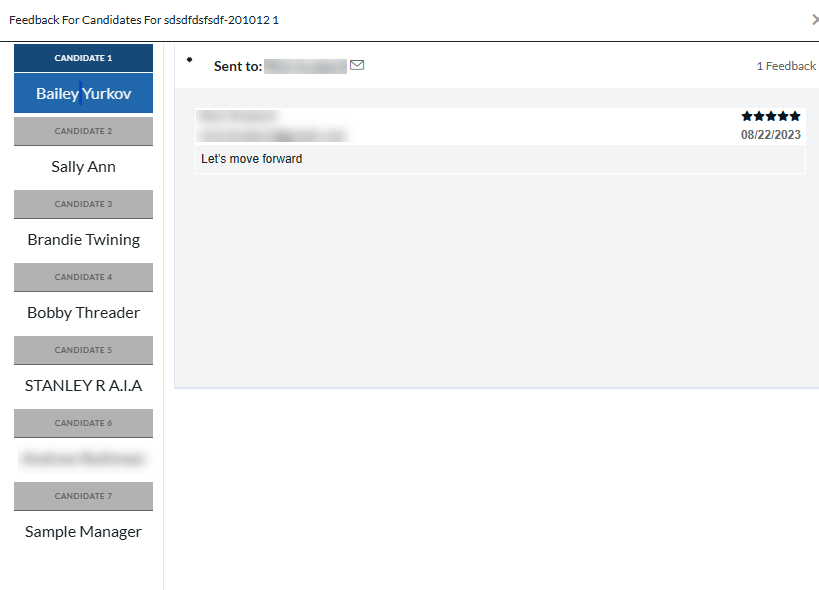
Submitting Feedback for a Candidate #
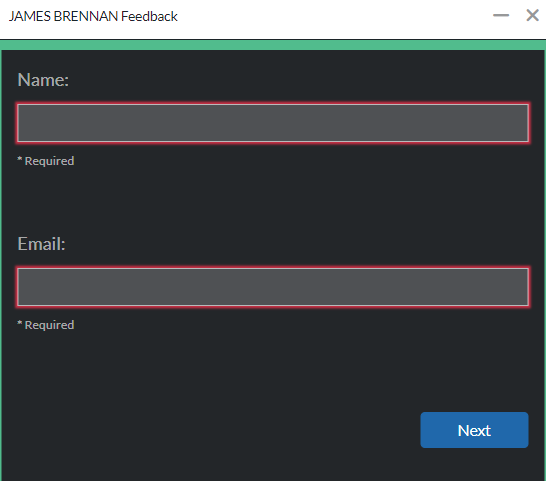
When a Hiring Authority is viewing a candidate presentation they will see a Feedback option at the top of the details column. They can select to enter Feedback for each candidate included in the presentation. The feedback entered will include their name, email address, feedback text, and star rating.
Note: We require the Client to enter their Name and Email Address each time feedback is submitted – this allows for easy tracking and viewing of feedback lists (even if the presentation has been forwarded to another person).
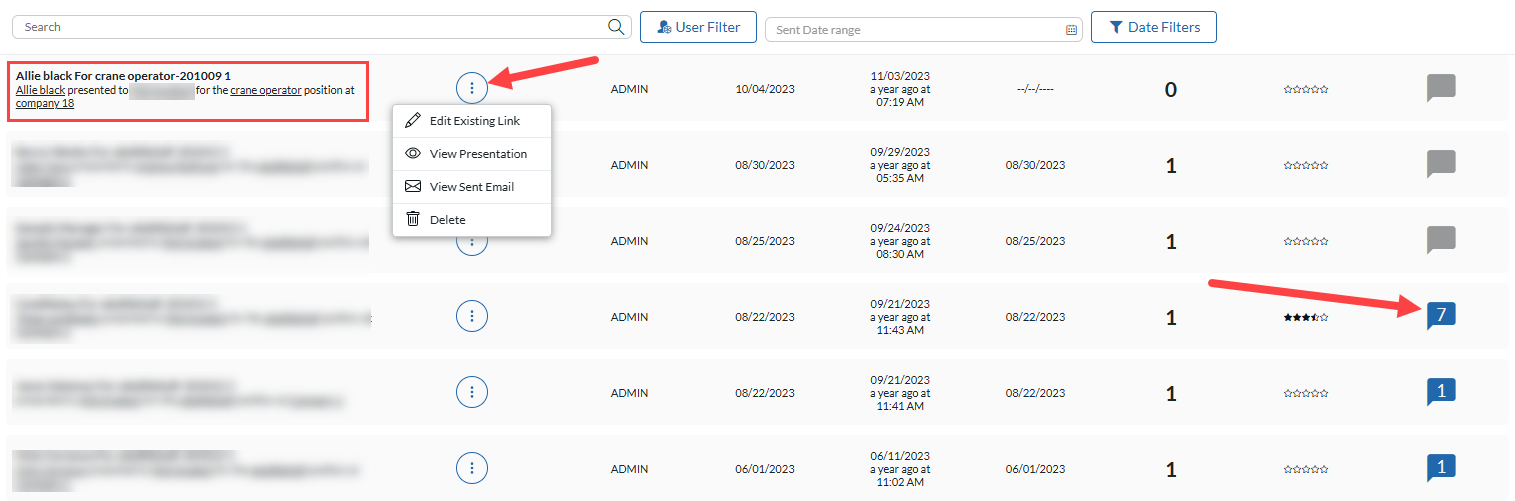
Viewing Presentation Lists (Results) #
You can access your presentation lists from Name, Company, and Position records; (via the Presentations navigation icon) these lists will display the following:
- Presentation Name
- Names of the candidates being presented
- Who the candidates have been sent to
- Option to edit the presentation
- Username of the presentation sender
- Date the presentation was originally sent
- Date of presentation expiration – the link will not be accessible after this date/time
- First View: This is the date that the presentation was accessed by any recipient for the first time
- Total Views: How many times the presentation has been opened in total (this includes any recipients who have been forwarded the presentation)
- Rating: This is an average rating of all feedback submitted for the presentation (If viewing a name record, it is the average for that specific name)
- Feedback: Choose this option to view all feedback for the presentation
- Company Record: Shows all presentations and feedback that were initiated from a Position Pipeline within that Company
- Position Record: Shows all presentations with feedback sent from that specific Position Pipeline
- Name Record: Shows all presentations that specific name has been a part of, but only shows feedback for the specific record
You may also access your main Presentation List (Master List) from System – Presentations – Candidate Presentations Overall List (You must have the correct level of security to do so).
While viewing your presentation lists in any of the areas mentioned above, all the records involved appear in a clickable format – this allows the user to easily jump to a record that was presented, to the position they were presented to, the Client they were presented to, or the Company.