Customizing the search area within your database empowers you to extract the most precise and relevant information from your data. By aligning the search area with your unique requirements, you can streamline the retrieval of essential information, focus on data attributes that matter the most, and create a user-friendly search experience.
Save As Default #
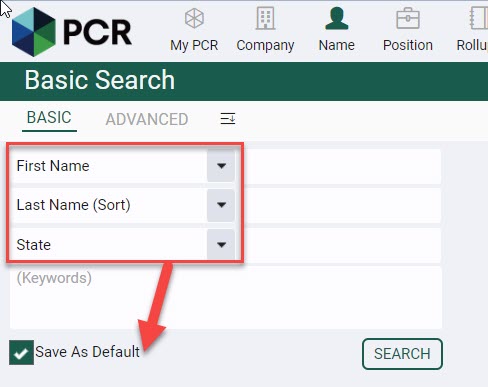
When you first enter the BASIC search, you’ll notice three field dropdowns. You have the flexibility to change which three fields appear as defaults in these dropdowns. Here’s how you can do it:
- Access COMPANY, NAME, POSITION from the main menu.
- Select the fields you want to set as defaults. Please note that any text entered into the search boxes will also be saved as part of your defaults.
- Check the “Save As Default” box.
- Click SEARCH. When you return to the BASIC search, your preferred three fields will be retained.
Field Search Dropdowns #
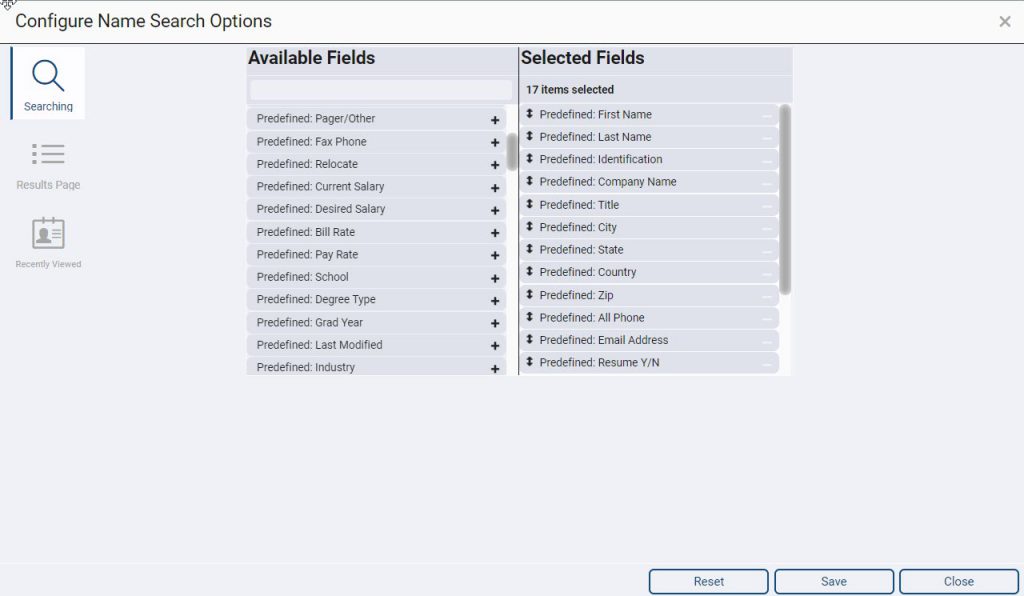
Through customization, you have the ability to selectively hide fields in dropdown menus that you never use.
- Access COMPANY, NAME, POSITION from the main menu.
- Click Customize at the top of the search area
- In the “Searching” tab. If all fields are listed under Available fields at the left, you’ll be able to select any field to search.
- Move fields to the pane on the right to limit search dropdowns to only the selected fields. Fields remaining under “Available” will be hidden when selecting fields to search.
- Click Save. Your search dropdowns will now be based on your selections.
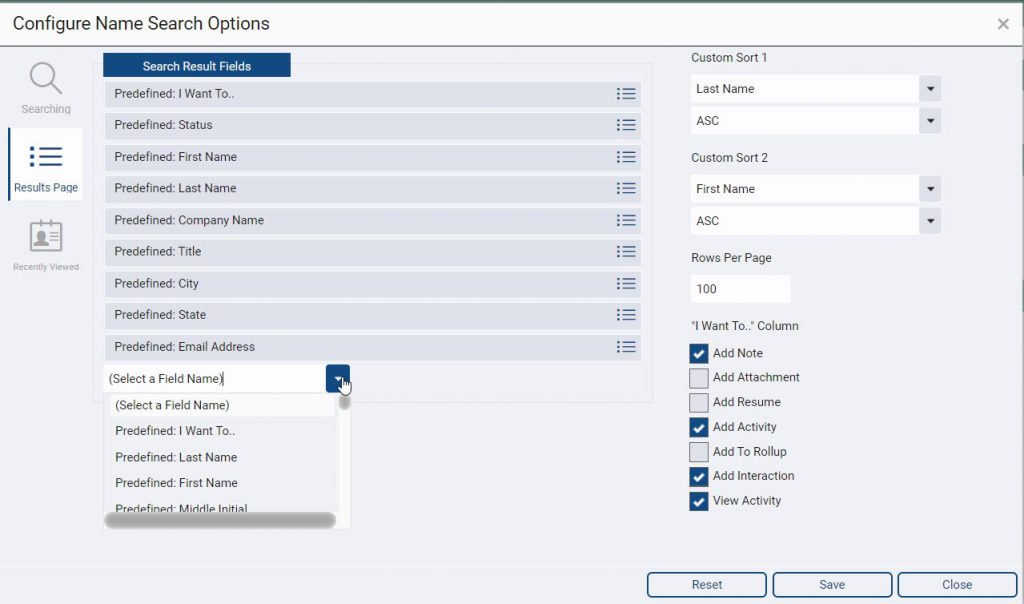
Search Results #
Customizing the fields displayed when viewing your list of search results can help you focus on what matters most to you. Here’s how to do it:
- Access COMPANY, NAME, POSITION from the main menu.
- Click Customize at the top of the search area.
- Choose “Results Page” in the sidebar.
- Under “Search Result Fields,” select “Click to set field.”
- Select the field and drag to rearrange the order as needed.
- Use the “Custom Sort” dropdowns to specify your sorting preferences.
- Select your preferred “Rows Per Page” (maximum 100).
- Select which shortcuts should appear in the “I want To” column.
- Click “Save.”
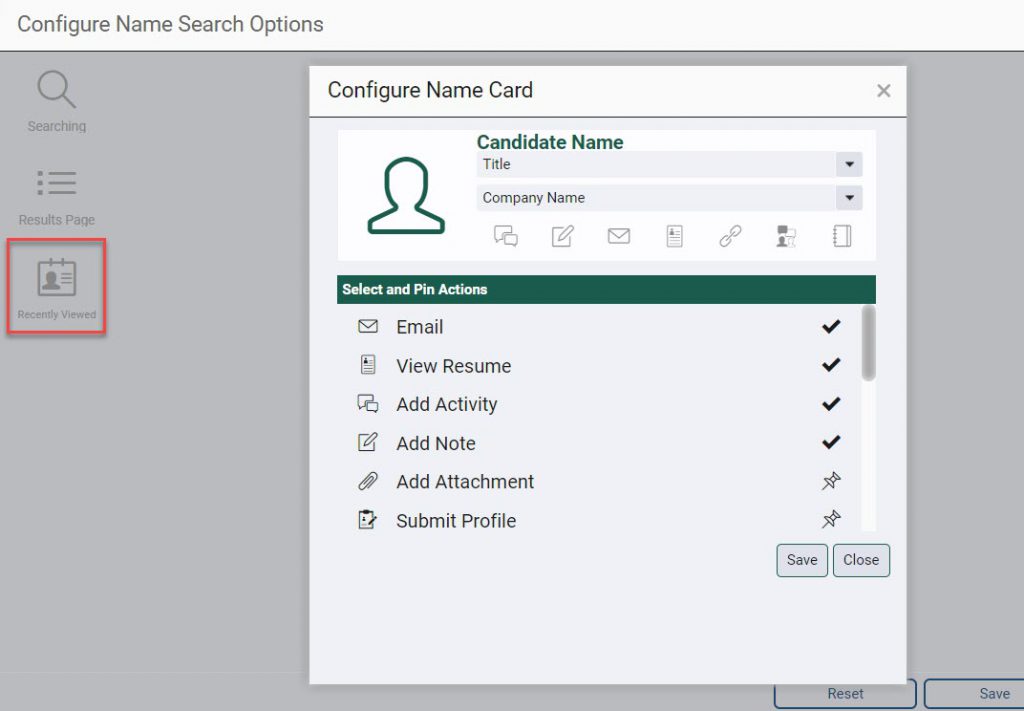
Recently Viewed Cards #
The purpose of a “Recently Viewed Card” is to offer users swift access to the records they’ve recently interacted with. This feature simplifies the process of revisiting or resuming work on these items, eliminating the necessity to navigate through menus or conduct time-consuming searches. Users can further tailor their experience by customizing the two fields displayed beneath the record name and configuring up to eight convenient shortcuts. Here’s how to do it:
- Access COMPANY, NAME, POSITION from the main menu.
- Click Customize at the top of the search area.
- Choose “Recently Viewed” in the sidebar.
- Below the record name, you’ll find dropdown menus. Use these to select the two predefined fields you want to display beneath the name.
- In the “Select and Pin Actions” area, you can choose up to eight shortcuts to appear on the record card. The order in which you pin these shortcuts determines the order in which they will be displayed.
- Click Save.