The purpose of Goals and Key Metrics is to elevate your Analytics from merely displaying data to actively measuring your progress toward specific objectives.
Configure Goals #
To fully leverage the Key Metrics feature in Analytics, you’ll need to define goals for each user. Before you begin, ensure your Data Sets and Groups are in order, as goals are tied to specific Groups within your Data Sets.
- Begin by accessing the Analytics Menu and selecting the Administration tab. From there, click on “Goals.”
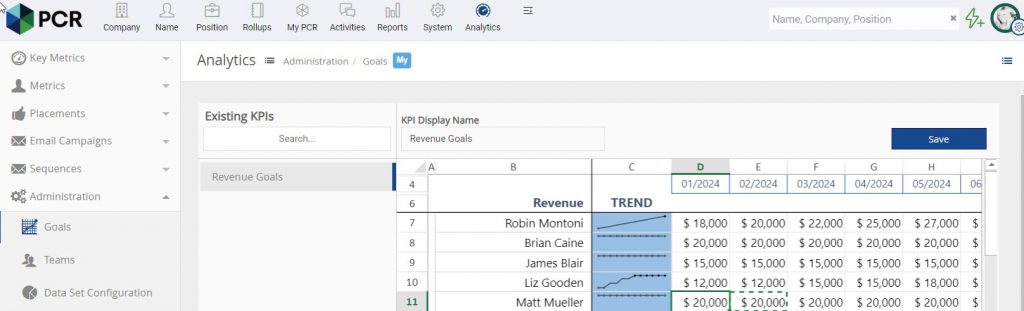
- In the Goals section, you’ll find the option for Revenue Goals. The actual revenue to be compared to the goal is calculated from the Placement Fee for Permanent Placements and the Contract Estimator section for Contract/Temp Placements. Click on Revenue Goals and use the spreadsheet to input goals for each user on a monthly basis.
- In the Goals section, you’ll notice a blue box. Click on the link in the blue box to add a new KPI. You can also add a new KPI through the options menu located in the top right corner.
- Choose the Data Set’s Group name for which you want to establish goals.
- Provide a descriptive name for this KPI in the “KPI Display Name” box.
- Define the direction in which you want the trend to go. For instance, select “Higher is Better” for metrics like “Onsite Interviews” and “Lower is Better” for metrics such as “Rejected Candidates.”
- Utilize the provided spreadsheet to input goals for each user on a monthly basis.
- After inputting a goal, you can easily replicate it across other cells and then save your changes.
- Don’t forget to save your goals after entering them.
Configure Key Metrics #
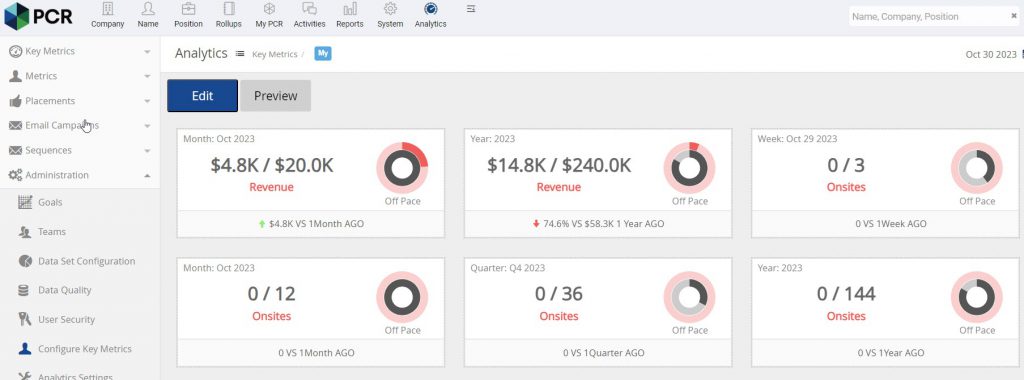
Key Metrics has its dedicated section in Analytics, distinct from basic data calculations. Here, you’ll gain a comprehensive view of your performance relative to your predefined goals, going beyond simple data presentation. Additionally, you have the flexibility to design the page, assign it to users and teams, and even schedule Key Metrics to be emailed, providing a tailored and efficient approach to performance analysis.
- Access the Administration feature through the Analytics Menu.
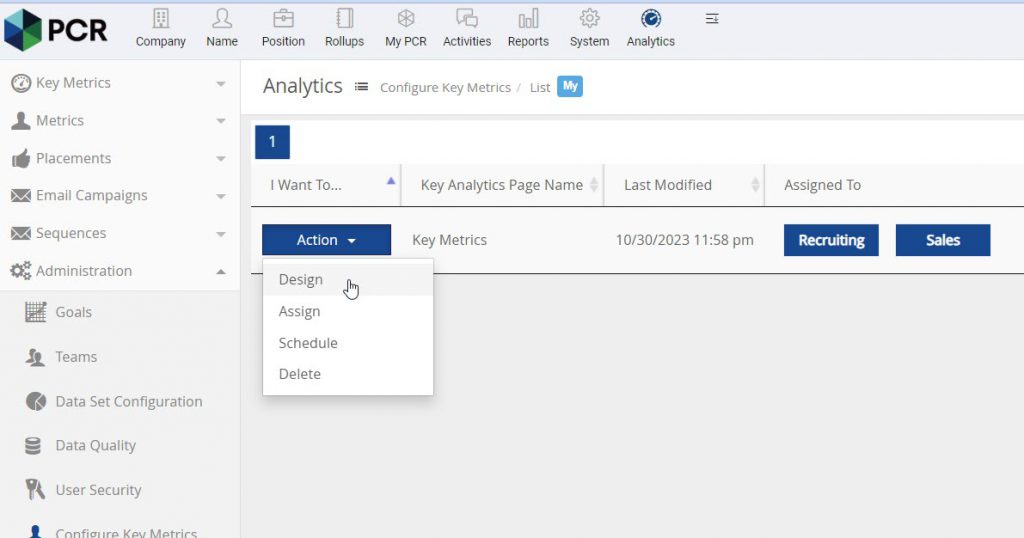
- Choose “Configure Key Metrics.”
- In the top right corner, click on the Options Menu and select “Add.”
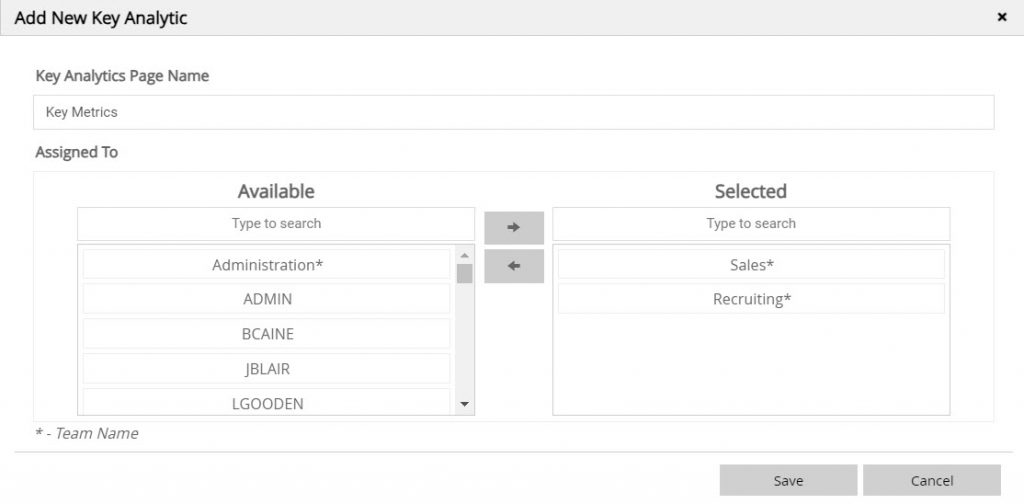
- On the “Add New Key Analytic” screen, provide a name for your Key Metric and assign it to the relevant users or to a Team. You can do this by moving the user or teams name to the “Selected” column on the right side of the screen. These users will see the Key Metric upon logging in to the Analytics.
- Next, open the Action dropdown for the appropriate Key Metric and select “Design.”
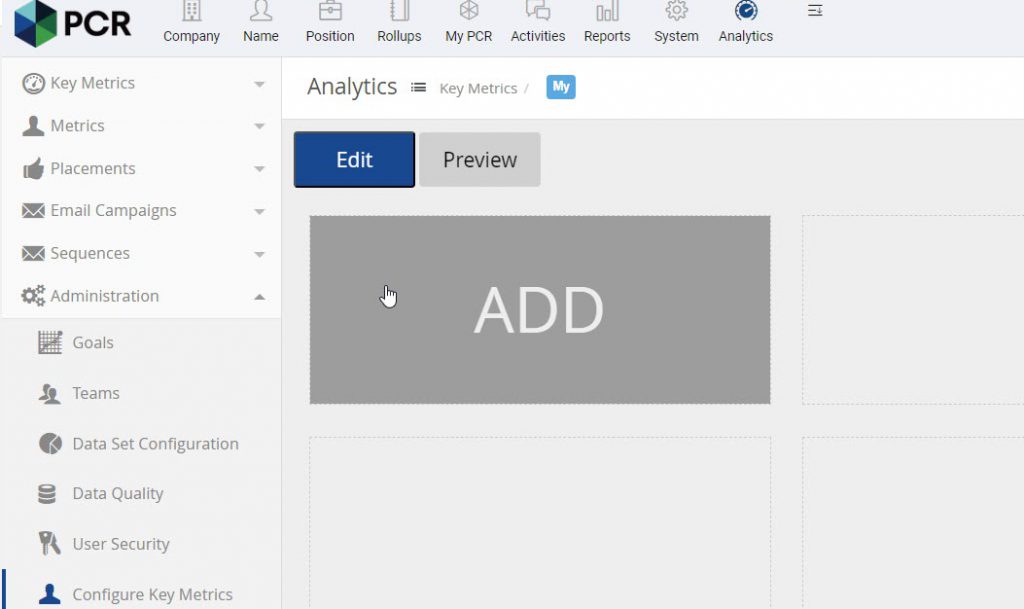
- You will notice eight blank rectangles at the top of the screen. Hover over an available slot, and you’ll see “Add.” Click to proceed.
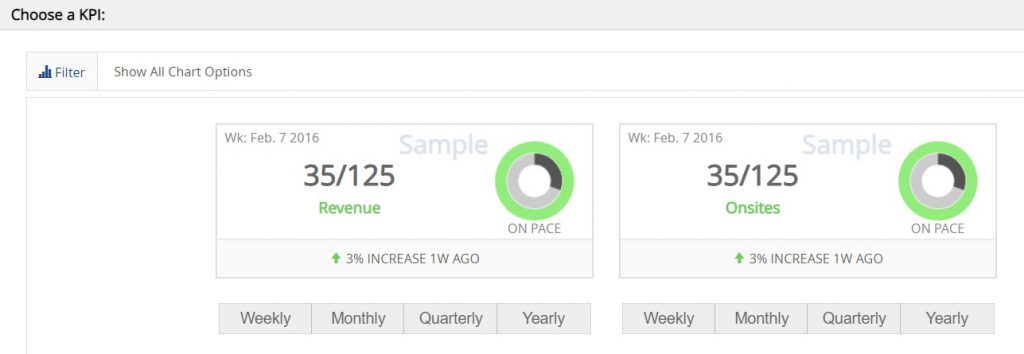
- You will be presented with a list of the Goals you have created. Choose the timeframe for which you wish to analyze the goal: Weekly, Monthly, Quarterly, or Yearly.
- Once you’ve chosen the timeframe, the Goal will be analyzed using sample data. You can view the goal in fraction form (number complete over goal number), a circle chart with the black bar representing your current progress, and statistics for the current timeframe compared to the previous.
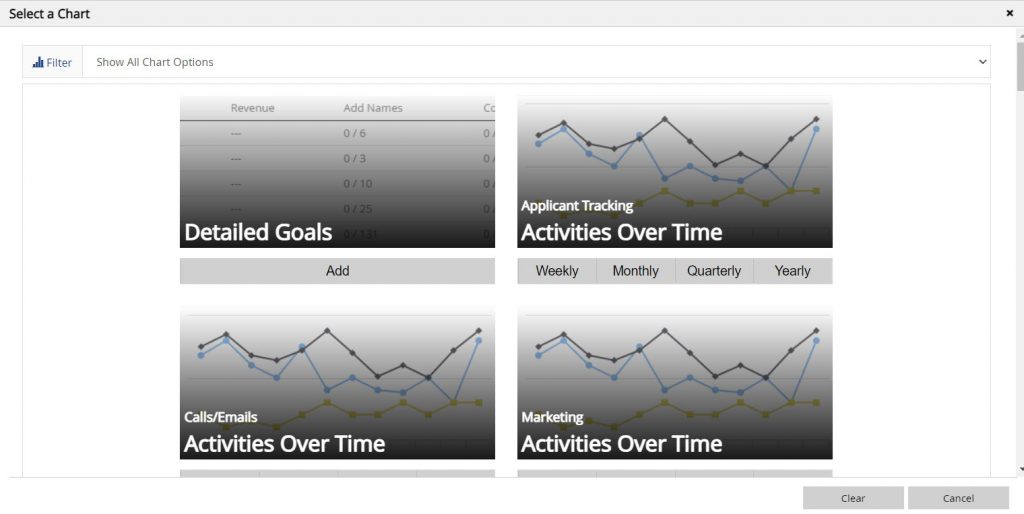
- You also have the option to scroll past the 8 rectangles and add up to 4 Charts. The “Detailed Goals” chart is a commonly used option, especially when analyzing Key Metrics for a multiple users or a team. It offers a detailed breakdown of individual performance in comparison to their specific goals. The remaining charts are related to your Data Sets or Mail Campaign activity.
Sending Key Metrics #
You can streamline your workflow by scheduling the automatic delivery of Key Metrics to PCRecruiter users on a recurring basis.
- Go to the Analytics Menu and select the Administration tab.
- Choose “Configure Key Metrics.”
- For the desired Key Metric, select “Action” and then “Schedule.”
- Click on “Add.”
- Designate the recipients who will receive the Key Metric via email by moving their names to the selected area.
- Select “Next.”
- Choose the desired frequency for email delivery.
- Select “Next.”
- Choose whether you prefer to send the Key Metrics as “Inline HTML” within the email body or as a PDF attachment. You also have the option to configure the email subject and text to suit your preferences.
- Select ‘”Finish” to complete the setup. These scheduled emails will be send in the early hours of the morning on their designated send days.