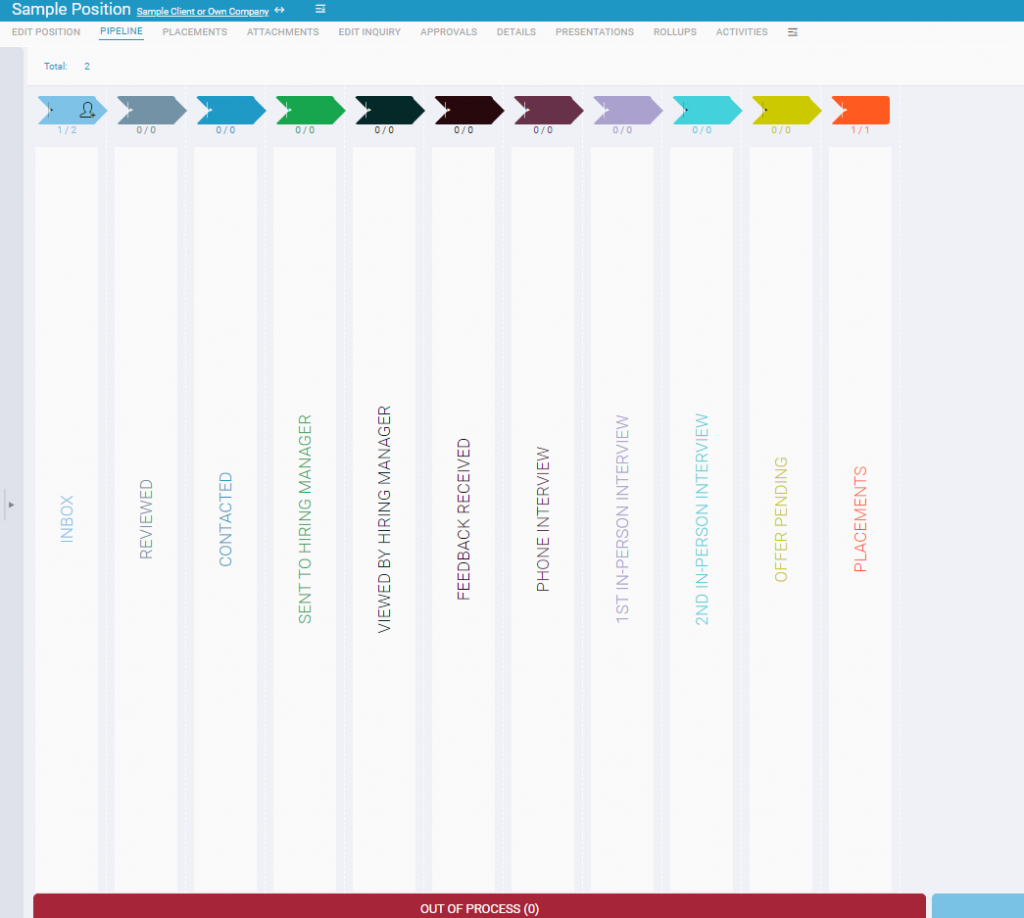
The Pipeline is used to track a user’s Candidates in relation to a specific position including what Step they are in during the Interview Process and any Activities that are happening along the way. This can include things such as Telephone Interviews, In Person Interviews, Background Checks, Referral Calls, and additional options that can be catered to your specific organization. The Pipeline also allows for easily interacting with the Candidates via a quick Drag and Drop of their Record Card, or Adding an Interaction with complete details.
There is also a Detail Pane which allows for a quick overview of the Candidate Record, Viewing Notes, and quickly paging through Resumes of the Active Candidates.
Click here for a video on the New Pipeline. Click here for a step by step interactive course on the New Pipeline. Don’t have a login? Contact your administrator or reach out to PCRecruiter support for assistance.
Navigating the Pipeline #
Do the below screenshots look different than your pipeline view? Click here to view our legacy pipeline instructions. If you’re looking to upgrade reach out to us, we would be happy to discuss your options.
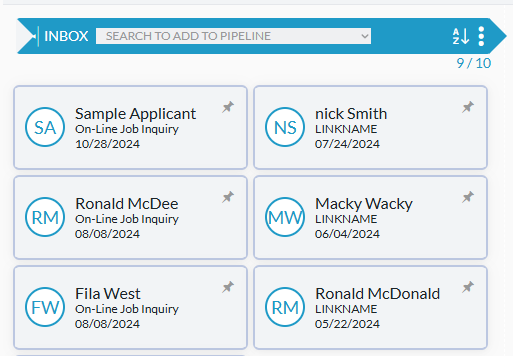
Inbox #
The Inbox will show all Names that have been Linked to the Pipeline by a user or who have applied to the Position via the PCRecruiter Job Board (or other 3rd party sites that may be linked). Below the records’ Name, Linkname or Online Inquiry will be displayed as well as the date that the action took place.
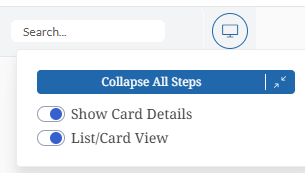
Pipeline View Options #
Located in the top right corner of the Pipeline, the Pipeline View Options allow you to adjust the View of your Pipeline quickly and easily. You can choose to display or hide additional Card Details, switch between the Card and List view, or Expand/Collapse all of the Columns.
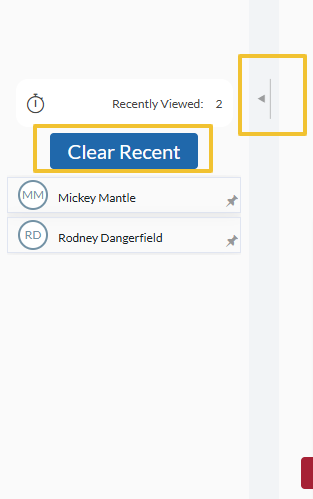
Recently Viewed #
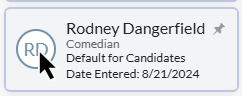
Once the Detail Pane has been opened for a Name (via the Right Click Menu), that Name is then added to your Recently Viewed in the tab on the left. These Recently Viewed Names are specific to your Username and this Pipeline.
If you would like to start fresh with your Recently Viewed Names simply click Clear Recent above your list of Recently Viewed names.
Pinned #
From the Name Cards or the Detail Pane you can choose to Pin a Name. This is great for batch processing to allow you to quickly flip through and identify top candidates. These Pinned Names can then be found in the tab on the left. Clicking a Name from the Pinned panel will open the record in the Details Pane. From here you can easily flip through all your Pinned Names using the arrows. Pinned Records are specific to this Position and can be seen by other users.
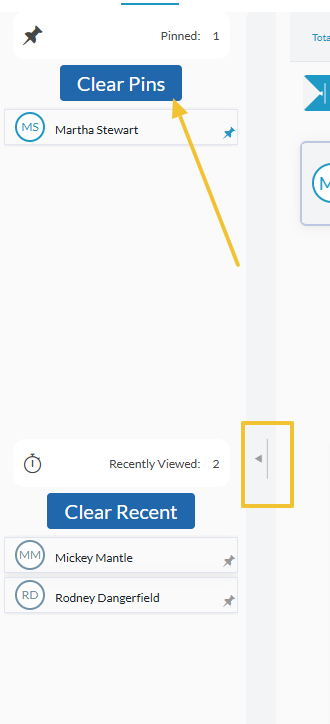
If you would like to start your Pinned records from scratch, click Clear Pins above your list of pinned names.
Sorting #
Each Step can be sorted by clicking the ‘AZ’ icon at the top. Once you select the icon you can sort Ascending or Descending by the following options:
- Date Entered
- Step Date
- Activity Date
- Activity Count
- Rating
Whichever option you choose will be displayed as the bottom line on the record card. (Note: The sort feature does work within the Inbox and Placements, but the display will not change to reflect the sort field name). The record card layout can be customized in your system settings. Click here to see how to customize these settings.

Actions/Out of Process #
At the bottom of the Pipeline you will see Actions and Out of Process options. Once records have been selected, you can choose to move them Out of Process or complete an Action via these options.

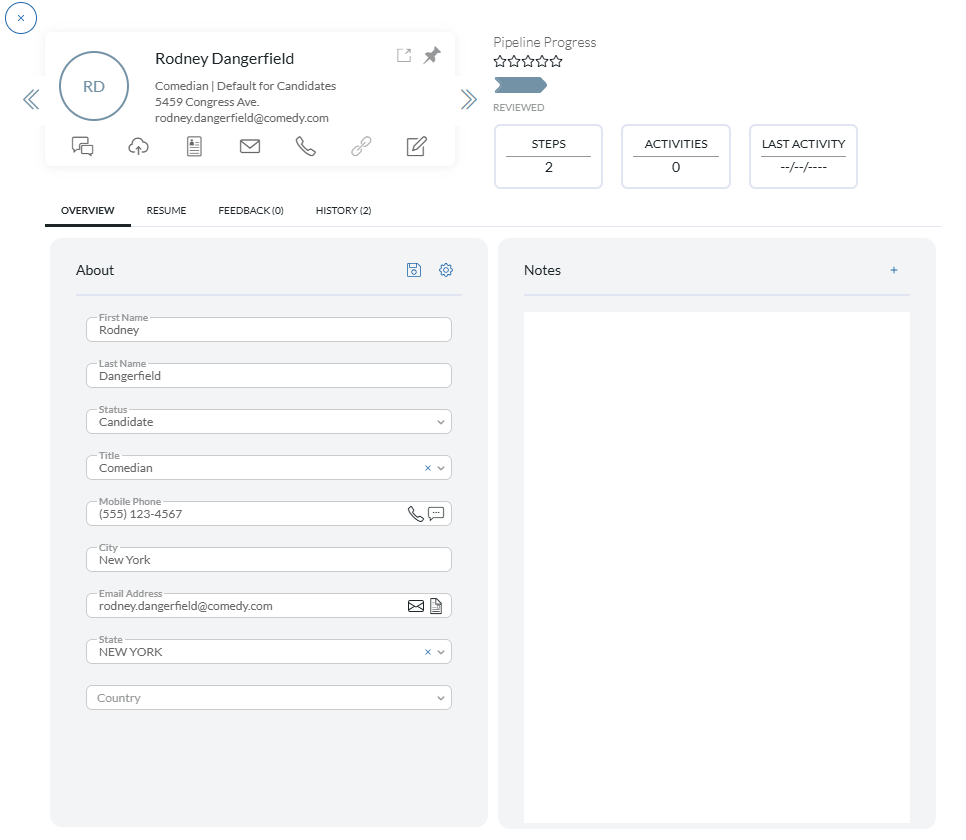
Detail Pane #
The Detail Pane is a view that will slide out from the right side of the screen when accessed. It displays the following information:
- Basic information about the Name
- Resume
- History (Here you can edit a Step that has been saved previously to reschedule or add notes)
- Feedback
- Name Notes
- Pipeline Progress
- Star Rating
Once the Detail Pane is opened you can utilize the left and right arrows to flip through the other Names in that Step (or Pinned Names if accessed from the Pinned Panel).
You can access the Detail Pane by clicking the Record Icon within a Card.
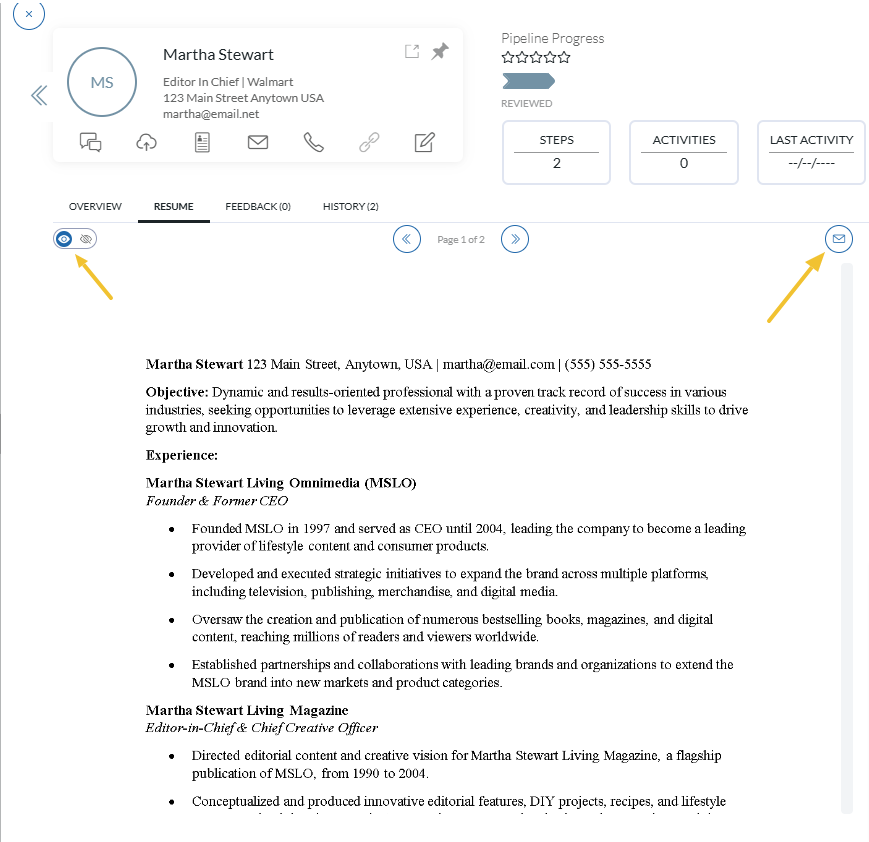
Resume #
When viewing the Resume tab you can choose to view either the regular or blinded version of the Candidates Resume. You can also click the email to send the blinded version. If you would like to send the regular version, click the PCR Files tab on the Compose Email screen to select it.
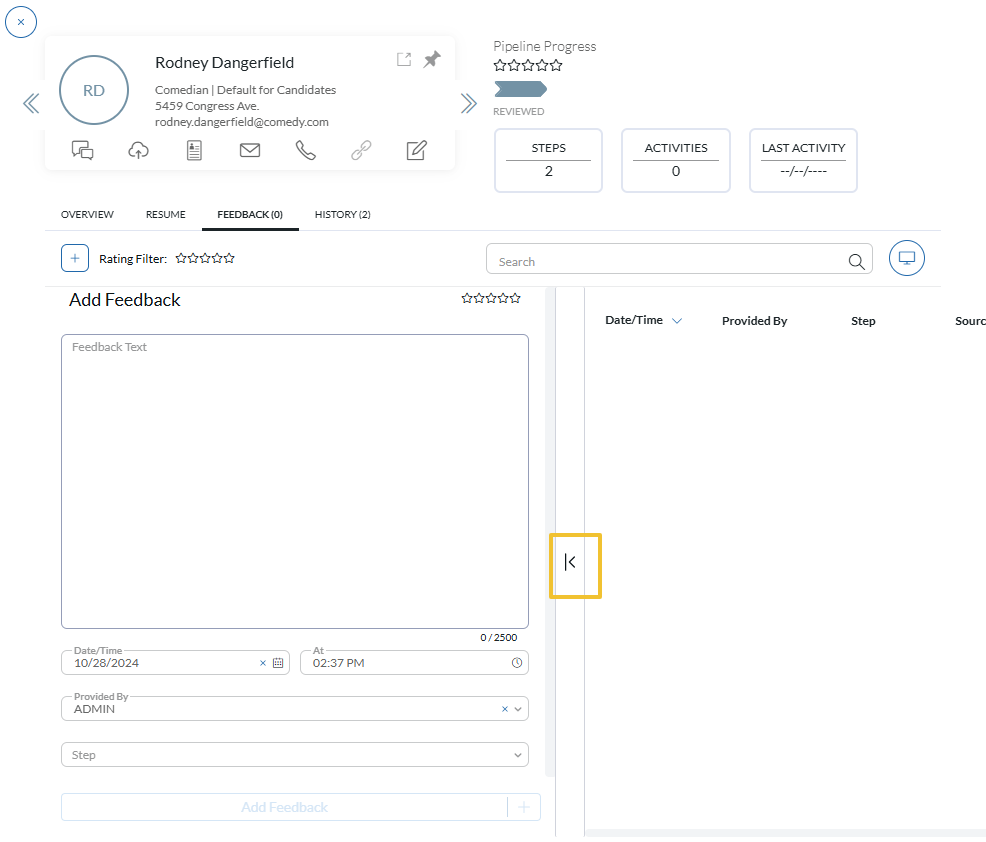
Feedback #
The Feedback area allows users to manually add and view feedback for the selected Candidate in regards to the Pipeline currently being viewed. By selecting Add, the User will be prompted to enter the following details:
- Star Rating: A visual indicator of how “Good or Bad” the Feedback is.
- Feedback Text: The content of the Feedback.
- The Date/Time
- Provided by: Who is providing the feedback
- (Optional) Step: The specific pipeline step that the feedback applies to.
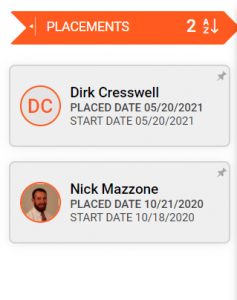
Placements #
Placements are the final step in your Pipeline process. Here you will find all Candidates that have been placed either Permanently or on Contract for the Position. To Place a Candidate, simply drag and drop them into this step, you will then be prompted to select if it is a Permanent or Contract Placement. Once you make a choice you will then be prompted to enter the Placement Details.
Once a Candidate is Placed, right clicking will allow you to View the Placement Details or Delete the Placement (Deleting the Placement will return them to their previous Step).
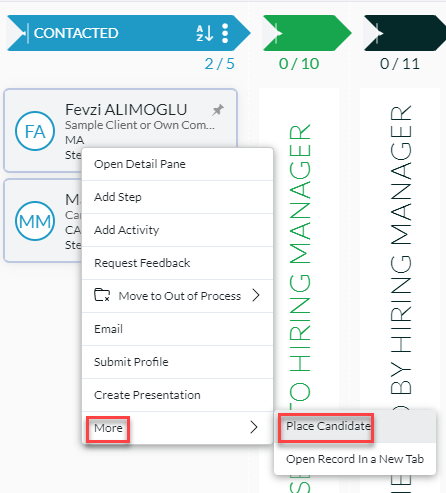
By right clicking a Candidate, you can also choose Place Candidate from the action menu. Go to ‘More’ and then select ‘Place Candidate.’ Doing so will automatically move them to the Placements area.
When viewing a card in the Placements Step the Placed Date and Start Date will always be displayed.
Other Pipeline Views #
Name Pipeline #
The Name Pipeline allows users to see an overview of a Candidate in relation to any positions they are in the Pipeline for. This view can be accessed by selecting Pipeline from the Navigation Menu on a Name Record.

Once on this screen you will see each Position they are linked to, and you can determine where they are in the process by using the following key:
- If a Step is colored in, they have been (or are currently) in that step
- The Horizontal Bar under a Step shows where they currently are in the process
- An Outlined Step indicated that the Candidate skipped that Step
- A grayed out Step indicates that the Candidate has not yet gotten to that Step
Click the arrow to expand each row to view additional details. From here, you can click any Step and Edit it.

If you wish to add a Step to a Candidate or move a candidate Out of Process, you can do so by clicking the corresponding ‘+’ icon for the Position on the Right.
Note: If the Candidate is linked to any Positions that are utilizing the legacy Pipeline, you will not see the pipeline overview. You can, however, click the arrow to see the details and edit any Interviews as necessary.
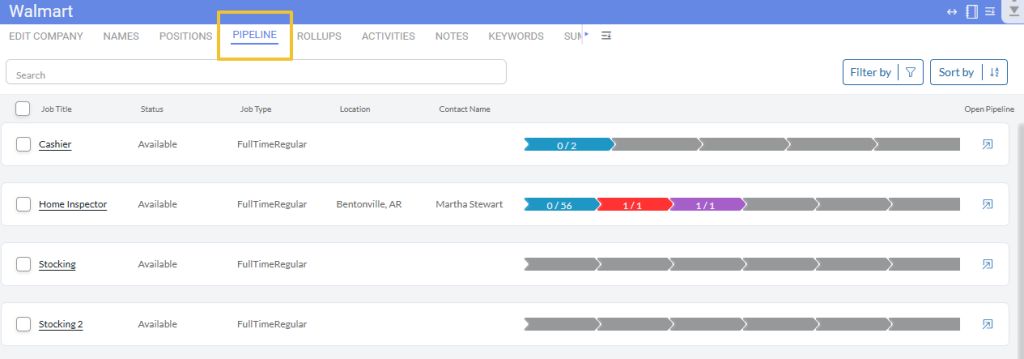
Company Pipeline #
Similar to the Name Pipeline, the Company Pipeline screen allows you to see all Positions for a Company and an overview of each Pipeline. This view can be accessed by selecting Pipeline from the Navigation Menu on a Company Record. This overview screen will show you a count of how many Candidates are currently in a Step vs. how many Candidates have ever been in the Step.
Note: Any Positions using the legacy Pipeline will not show a Pipeline Overview. You will need to access the Pipeline from the Position to view the details.