Table of Contents
Creating a Custom User Metrics Report is a valuable tool for personalized performance tracking. It allows you to specify and combine activities or pipeline steps that are essential for monitoring. With the ability to view the source data behind each count, it offers a straightforward yet detailed way to understand and assess user performance.
Creating a Custom User Metrics Report #
- Click “Reports” on the main toolbar.
- Select the “Manage Custom Reports” action icon.
- Click on the “Manage User Metrics Reports” tab.
- Click “Add.”
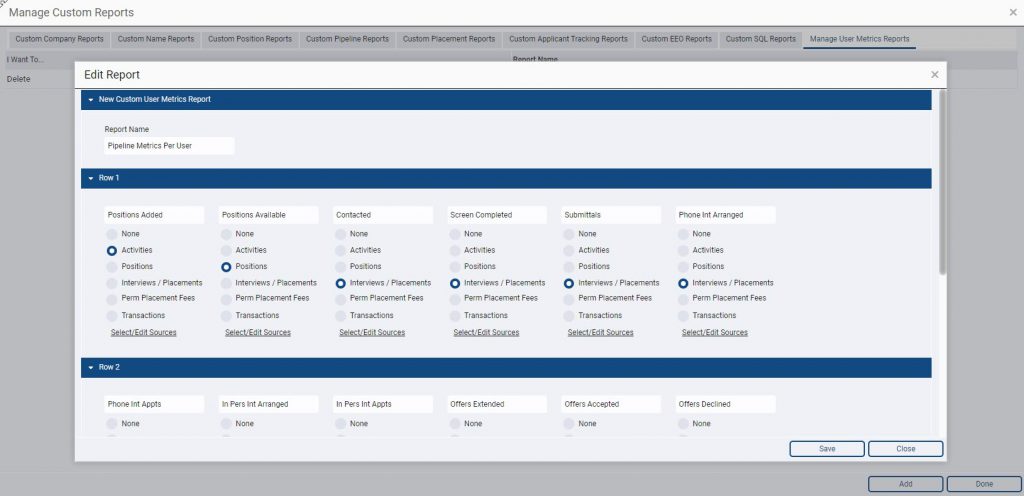
- Enter a title in the “Report Name” field.
- Include up to 18 metrics by adding a header, selecting the metric type, and defining its source. Detailed instructions for adding each metric type follow.
- After defining all metrics, click “Save.” Access the report in the Auditing Reports section of the Reports menu.
Metric Types #
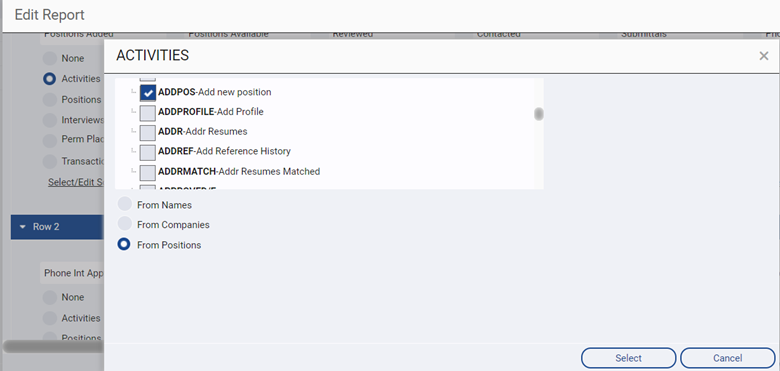
- To track Activities: This option lets you count how many times users have written Activities of different types to Company, Name, or Position records within a specified date range.
- Click the “Activities” radio button.
- Click “Select/Edit Sources.”
- Check the box corresponding to each Activity Type for calculation.
- Specify the record type for calculation (From Names, From Companies, or From Positions).
- Confirm selections by clicking “Select.”
- To track Positions by Status This option lets you count the number of Position records per User Name with a specified Status. You can exclude or compare against Date Posted, Begin Date, or End Date in the Position record. For example, to tally Available Positions regardless of Date Posted, select Available as the Status and ignore the date range.
- Click the “Positions” radio button.
- Click “Select/Edit Sources.”
- Check the box corresponding to each Position Status for calculation.
- Choose the calculation method: All Positions by User (Ignore Date Range), Base on Date Posted, Based on Begin Date, or Based on End Date.
- Confirm selections by clicking “Select.”

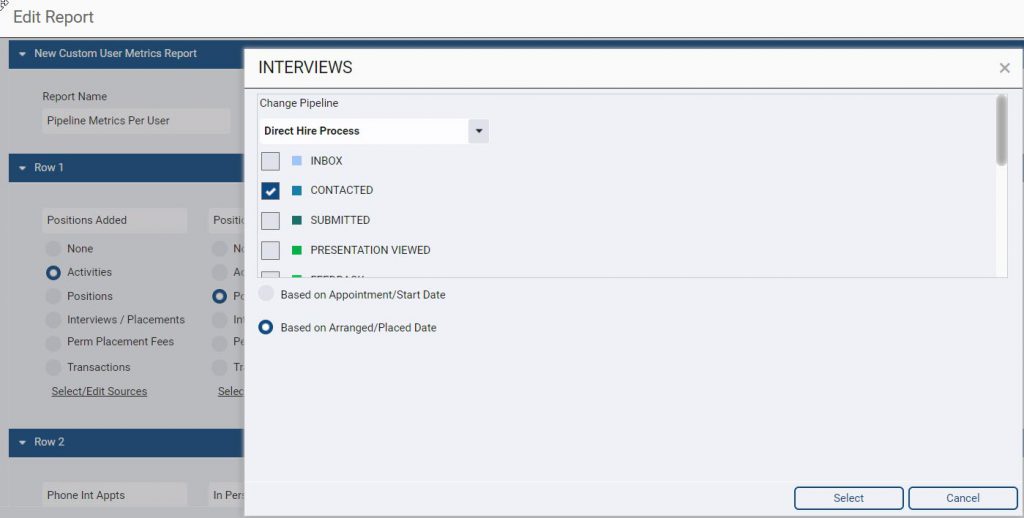
- To track Interviews/Placements This option lets you count the number of pipeline records records per User Name with a specified step name. The Appointment/Start and Arranged/Placed date settings calculate based on when the pipeline record was created versus when it is scheduled to occur.
- Click the “Interviews/Placements” radio button.
- Click “Select/Edit Sources.”
- Check the box corresponding to each Pipeline Step for calculation.
- Confirm selections by clicking “Select.”
- To track Placement Fees This option lets you sum the amounts entered into the Placement Fee field of the user’s permanent placement records.
- Click the “Perm Placement Fees” radio button. No need to click “Select/Edit Sources” as it is pre-selected for this metric type.

- To track Transactions This option lets you sum the amounts entered into the Transactions area of Company, Name, or Position records, or Splits added to a Placement.
- Click the Transactions” radio button.
- Click “Select/Edit Sources.”
- Click “Cash-In (Revenue or Cash-Out (Expenses) for Company Name or Position. Or click Splits.
- Click Select.
Generating a Custom User Metrics Report #
- Access the “Reports” section.
- Navigate to “Auditing Reports.”
- Choose the specific report by clicking on its name.
- Set a Date Range to limit your report.
- Modify the Selected Users as needed.
- Access the action menu and choose for your preferred export format. Please note that choosing “Print” will display the report in your browser, with each metric total hyperlinked for direct access to the related activities. This level of detail is exclusive to the “Print” option and is not available in other export formats.