Name, Company, and Position records can have a variety of file attachments. These can be attached to an individual record, or can be Global attachments that are accessible from any record.
Common uses for this feature are to…
- Store fee agreements
- Store cover letters
- Store PDFs, images, and other supporting documents pertaining to the record
The attachments area also stores system-generated items such as Profiles.
Attaching Files #
- Open any Name, Company or Position record.
- Click Attachments from the Navigation menu at the top of the record. Within this area you’ll see three tabs:
- Current Record: Attachments for the record being viewed.
- Profile Snapshots: Any stored Profile PDFs for the record being viewed.
- Global: Attachments available from all records in the database.
- If you wish to add a Global attachment, click the ‘Global’ tab before proceeding, otherwise remain on the ‘Current Record’ tab to attach the file only to the current record.
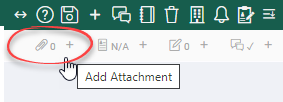
- Click the Add (+) option in the Action menu to open the Add Attachment dialogue window.
Add Attachment Options #
Within the Add Attachment window, you will have three options: Uploaded File, Linked File, and HTML.
- Uploaded File: Use this panel to upload files to the database for storage. Click ‘Add Files’ and pick one or more items from your computer to upload. After uploading, you will see “Delete” options for each, as well as a “Select All” checkbox if you wish to remove multiple uploads with the main “Delete” option at the top of the panel.
- Linked File: Use this panel to connect to an online file without actually storing it in the database. This can be useful for items that are being changed regularly by non-PCRecruiter users. To use this method, give the link a “Description” and then enter the full URL of the file (e.g. https://mysite.com/file.pdf) into the ‘File Name’ box.
- HTML: This area is for entering HTML content, such as letters, job descriptions, etc. Give the attachment a “Description” and enter the content into the editor.
Click Done to close the dialogue after you have finished.
Managing Attachments #
Once attachments exist on a record, they will appear in the Attachments area. This is where you’ll go to open or view your attached documents.
Note: In order to open files such as attached PDF or Word documents directly from this screen you’ll need the PCR Launcher properly installed.
You will see the following columns:
- I Want to…: Use the Action dropdowns to Edit, View, Delete, Copy, or Rename the attachment.
- Type: Indicates whether the attachment is a Profile, Upload, Linked File, HTML Document, etc.
- Description: The name of the attachment. Click on this to view the file.
- Job Title: When using a Profile form from the Job Board or Pipeline, the resulting attachment references both the Name and the Job it is related to. Attachments that relate to a Position will indicate it here.
- File Name: For file attachments, this column will display the name of the file. Even if the attachment is renamed, the File Name will remain the same.
- Date: Indicates when the attachment was created or last saved.
- Size: The file size of the attachment.