The standard email buttons on contact record screens and lists allow PCRecruiter users to send email out to any contact in the database. However, if you are using PCRecruiter’s integrated email client or IMAP sync, you can receive email directly into your database as well, facilitating connections between your correspondence and name records.
Using IMAP sync allows PCRecruiter to write Activity logs for your received correspondence which can be viewed from the relevant Name records.
Configure PCRMail #
Set Up Incoming IMAP Email #
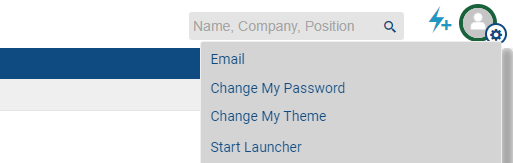
- Click the user options ‘gear’ icon at the top right corner of your PCRecruiter screen, at the right side of the Menu frame.
- Select Email to open the PCRMail area.
- Within the Email screen, two items are available in the Navigation menu: Email and Configure.
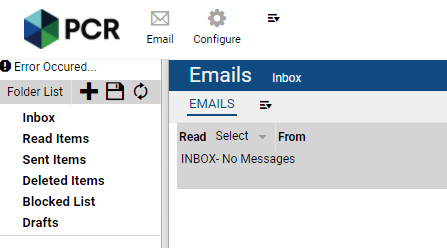
- Select Configure
- Select Mail Servers
- Click the Add + icon in the Action menu.
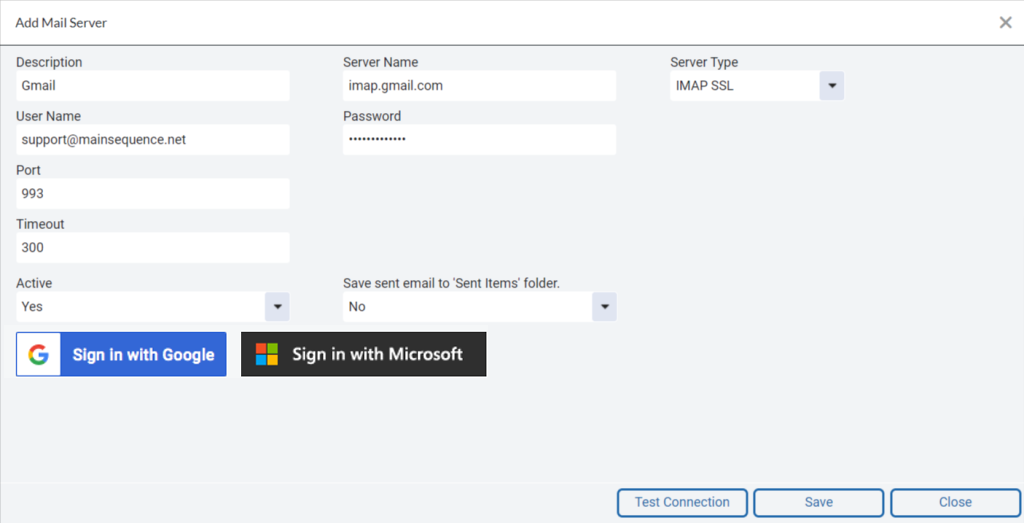
- In the window that appears, change the Server Type dropdown to IMAP SSL (if not already selected).
- Enter a Description for the connection. This will not be visible outside of the system and is used solely to differentiate mail servers.
- The Timeout will be automatically set to 300
- The Active dropdown will automatically be set to Yes. You can use this option to disable the IMAP connection without deleting it at any time.
Microsoft 365 Accounts #
Before using Microsoft 365 accounts with PCRecruiter, verify that the Authenticated SMTP and IMAP settings are enabled for the user:
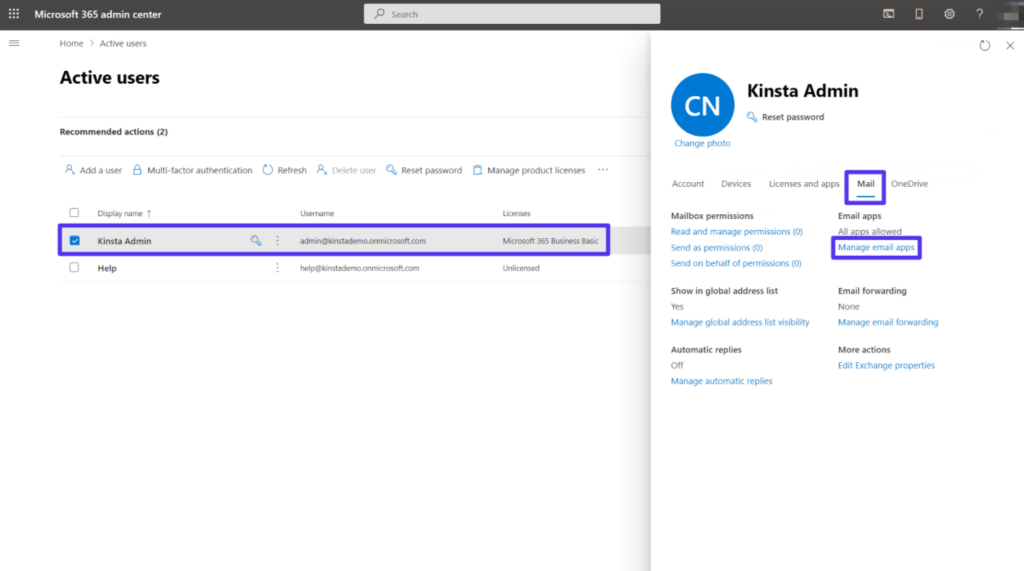
- Open the Microsoft 365 admin center
- Open Users > Active users.
- Select the desired user
- In the flyout that appears, click Mail.
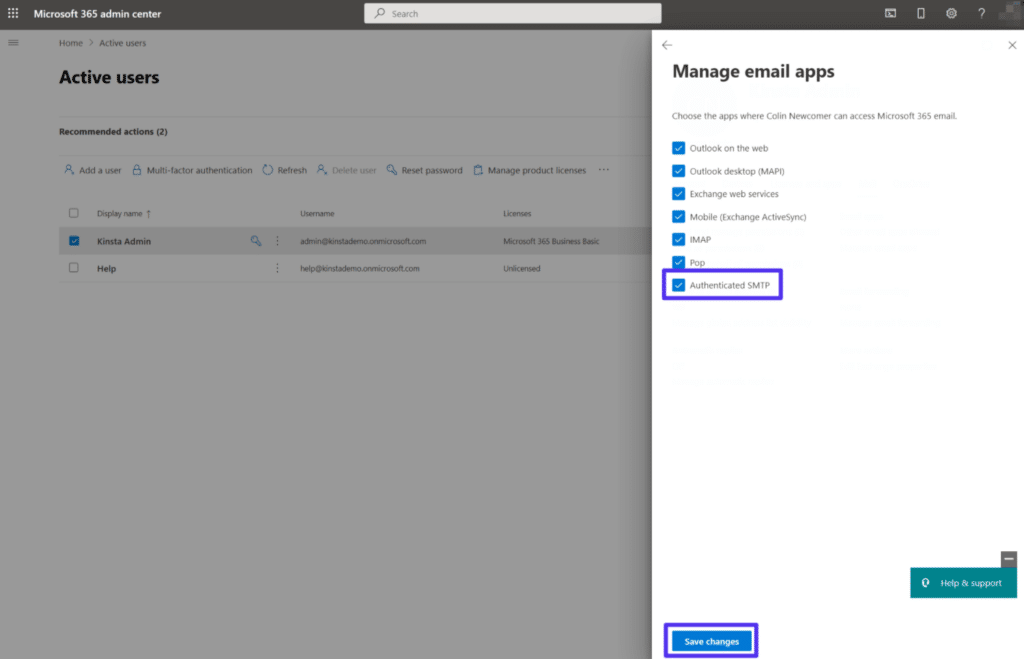
- In the Email apps section, click Manage email apps.
- Verify that the Authenticated SMTP setting is checked
- Save
To use IMAP to access your Office 365 email, you’ll first need to enable access.
- Select Settings > Mail > Forwarding and IMAP.
- Under POP and IMAP, toggle the slider for Let devices and apps use IMAP to ON depending on the account you are enabling.
- Select Save.
Sign In With Microsoft #
In the ‘Add Mail Server’ window:
- Click the “Sign in with Microsoft” button and proceed through the screens presented. After authorizing PCRecruiter to connect with your account, the Server Name, User Name, Password and Port field (993) will be automatically populated.
- Change the “Save sent email to Sent Items folder” dropdown to No. Microsoft will automatically store sent emails in the Sent Items folder, making this setting unnecessary. Leaving it set to ‘Yes’ will introduce duplicate sent items.
- Click Save
After you close and re-open the PCRMail, you will see folders appearing in the folder list on the PCRMail client, however it may take longer – sometimes up to 24 hours – to fully synchronize all emails. If this does not work please follow the instructions below to set up an app specific password
Alternative Method: Office 365 App Specific Password #
Based on security settings or other factors the authentication for your office 365 account may require you to use an app specific password to connect your email to PCR. Follow the instructions below for this and CLICK HERE to see an article from Microsoft with additional details.
- Make sure 2 Factor Authentication is turned on in your Office 365 account. This must be done by an Admin.
- Sign in and go to Advanced Security Options
- Navigate to Additional Security and Two-Step Verification
- Here you can Turn On the two factor settings.
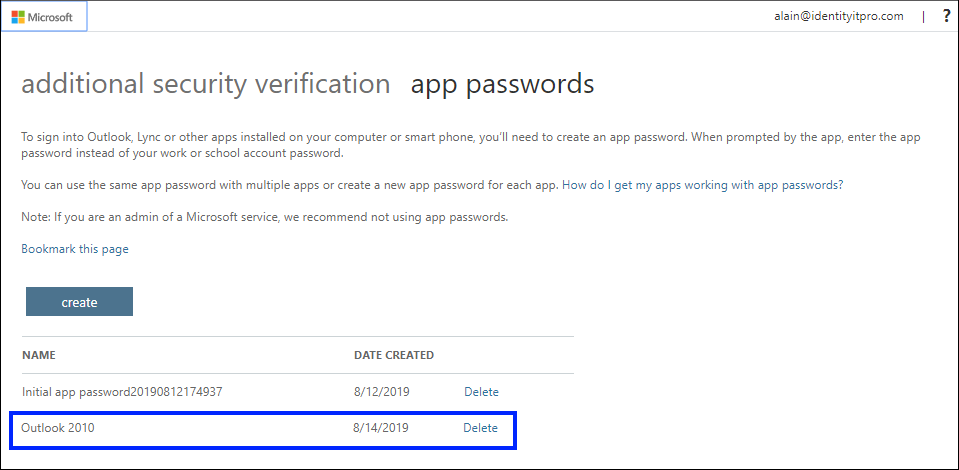
- Sign in to the Additional security verification page, and then select App passwords.

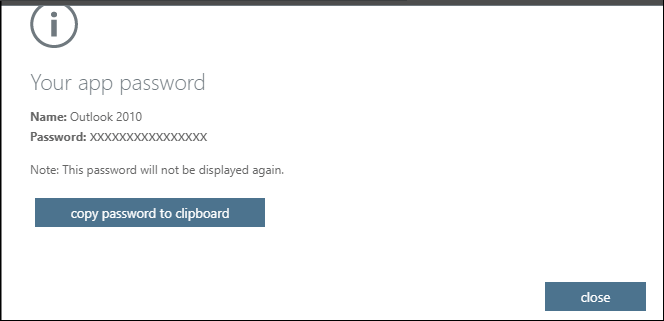
- Select Create, type the name of the app that requires the app password, and then select Next.

- Copy the password from the Your app password page, and then select Close.
- On the App passwords page, make sure your app is listed.
- The App Password should be pasted into the Password field in addition to the following information.
- Server Name: outlook.office365.com
- Server Type: IMAP SSL
- Username: Your Email
- Password: App specific Password you just created
- Port: 993
- Click test connection and then save.
Google Accounts #
Before using Gmail accounts with PCRecruiter, verify that IMAP is enabled for the Google account:
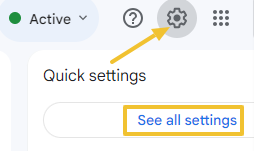
- In Gmail, open the Settings panel.
- Choose “See All Settings”
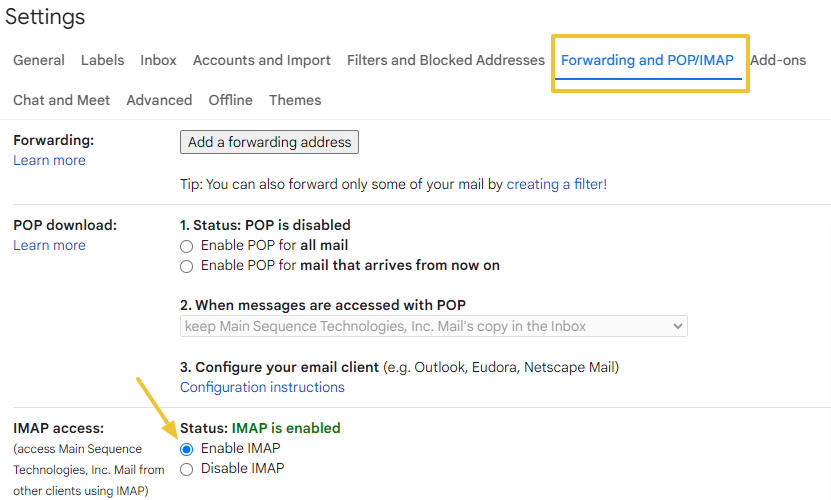
- Select Forwarding and POP/IMAP
- In the IMAP Access section, make sure Enable IMAP is on.
- Save
Sign In With Google #
In the ‘Add Mail Server’ window:
- Click the “Sign in with Google” button. Proceed through the screens presented. After authorizing PCRecruiter to connect with your account, the Server Name, User Name, Password and Port field (993) will be automatically populated.
- Change the “Save sent email to Sent Items folder” dropdown to No. Google will automatically store sent emails in the Sent Items folder, making this setting unnecessary. Leaving it set to ‘Yes’ will introduce duplicate sent items.
- Click Save
After you close and re-open the PCRMail, you will see folders appearing in the folder list on the PCRMail client, however it may take longer – sometimes up to 24 hours – to fully synchronize all emails. If this does not work please follow the instructions below to set up an app specific password.
Alternative Method: App Specific Password #
You must enable 2 Factor Authentication and create an App Specific Password so that PCRecruiter can securely connect to your email account.
- Go to your Google Account.
- Select Security.
- Under ‘How you sign in to Google’, select 2-Step Verification and follow the prompts to turn this on.
- Once 2-Step Verification is turned on, go back to the Google Account page using the back arrow to the left of the 2-Step Verification heading.
- In the “Search Google Account” search bar at the top of the screen, search for and open App passwords (https://myaccount.google.com/apppasswords)
- Enter a name that helps you remember where you’ll use the app password, e.g. “PCRMail”.
- Select Generate. A 16-character code will appear. Copy and save this code somewhere secure.
- Select Done.
Complete the Mail Server details in PCRMail:
- Enter the Mail Server Details:
- Server Name: imap.gmail.com
- User Name: Typically your full Email Address
- Password: The 16-character App Specific Password you created earlier, omitting any blank spaces.
- Port: 993
- Change the “Save sent email to Sent Items folder” dropdown to No. Google will automatically store sent emails in the Sent Items folder, making this setting unnecessary. Leaving it set to ‘Yes’ will introduce duplicate sent items.
- Click Save
After you close and re-open the PCRMail, you will see folders appearing in the folder list on the PCRMail client, however it may take longer – sometimes up to 24 hours – to fully synchronize all emails.
Other Email Providers #
If your email provider is NOT Microsoft or Office 365, you will need to manually complete the IMAP Server, User Name, Password, and Port fields. Check with your email provider’s documentation for details on the values for these fields. You may also need to change the ‘Save Sent Email to Sent Items’ folder setting depending on your particular provider.
The “Test Connection” button can be used to verify whether the IMAP connection is working. If it is functioning, you will see a green “OK” or other Success message.
After you close and re-open the PCRMail, you will see folders appearing in the folder list on the PCRMail client, however it may take longer – sometimes up to 24 hours – to fully synchronize all emails.
Set Sent & Trash Folders #
You will need to select which folder of your synced IMAP account is used for Sent and Trash.
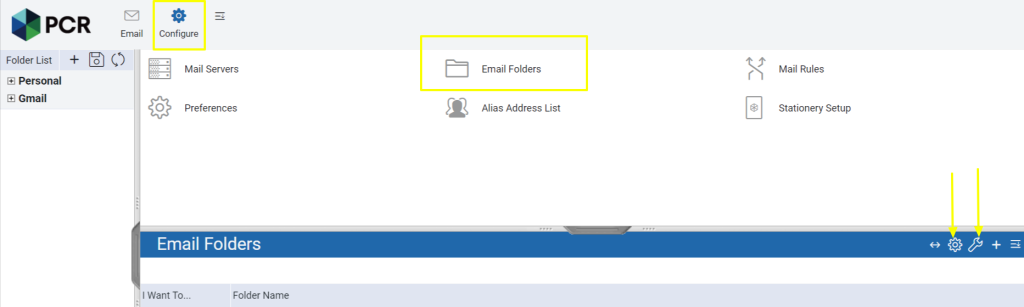
- Click the PCR mail icon at the top right corner of your PCRecruiter screen.
- Within the Email screen, two items are available in the Navigation menu: Email and Configure. Select Configure.
- Select Email Folders
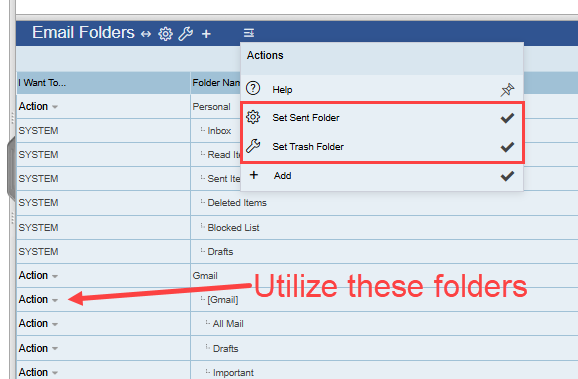
- In the Action menu, click Set Sent Folder
- In the Configure Sent Folder window, use the Action dropdown and select “Mark as Sent Items” on the proper Sent Items folder. (Please note this will be below the folders marked system and should match your own email folders.)
- In the Action menu, click Set Trash Folder
- In the Configure Trash Folder window, use the Action dropdown and select “Mark as Trash Items” on the proper Trash Items folder. (Please note this will be below the folders marked system and should match your own email folders.)
Email Preferences #

- Click the PCR mail icon at the top right corner of your PCRecruiter screen.
- Within the Email screen, two items are available in the Navigation menu: Email and Configure. Select Configure.
- Select Preferences
- In the Messages area you’ll find the following settings:
- Number of messages per page (Default: 40)
- Permanently delete messages (Do not place in recycle bin) (Default: No)
- Number of days to keep messages in Inbox after reading (Default: 7)
- Folder for read email (Default: Read Items)
- Minutes to auto check for new mail
- New Mail Sound Path or URL
- Refresh screens when deleting or moving messages (Default: Yes)
- Automatically Change Reply Text Color: (Default: Yes) This is the most commonly altered setting — we suggest changing it to NO. If set to Yes, PCRMail will select a random color for your text when replying to a mail to differentiate it from the rest of the thread.
- Display Incoming Read Receipts: Show
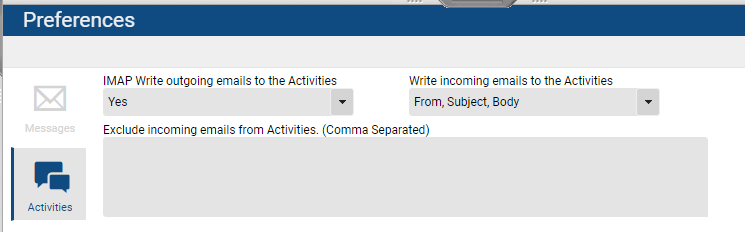
- In the Activities area, configure the following then click Save:
- IMAP Write outgoing emails to the Activities
- Yes (Default)
- No
- Write incoming emails to the Activities:
- None: PCRecruiter will not write ANY Activity when you receive an email from someone who is in your database.
- From: PCRecruiter will write an Activity containing only the date and who it was from.
- From, Subject: PCRecruiter will write an Activity and include the subject.
- From, Subject, Body: PCRecruiter will write an Activity and include a plain-text log of the body content. This is the most common and recommended option.
- Exclude incoming emails from Activities. (Comma Separated): Enter a comma-separated list of email addresses here to prevent PCRecruiter from logging any email Activity when receiving message from these accounts.
- IMAP Write outgoing emails to the Activities
- Lock PCRMail: This optional checkbox causes PCRecruiter to prompt for a password when opening the email client. This extra level of login is typically disabled, as PCRMail is only accessible after having logged into PCRecruiter itself.