Each User of the database should have their own outbound email account settings configured. This allows PCRecruiter to connect to a mail server to send the email through that user’s account just as any other email client, such as Outlook or Apple Mail, might do. This configuration should be done by ALL users who will be sending email from PCRecruiter, regardless of whether or not they are using PCRecruiter’s IMAP (incoming) email setup.
Each user can have one or more Email Aliases. When sending an email, the user can choose the appropriate Alias to use as the ‘From’ address for that mail.
NOTE: These per-user email settings are separate from the Outgoing Mail Settings for the database, which are used by automated emails not sent by a specific user or alias.
- Click System in the Main Menu at the top of the screen. Search for “Email Alias” list in the search box above the menu, or…
- Click Email Setup
- Click Email Alias List
- In the Alias Address List screen, click the Edit icon (pencil) on a card shown at the bottom, or use the ‘Add’ option in the Action menu to create a new Alias.
The following items appear within the Edit Alias screen:
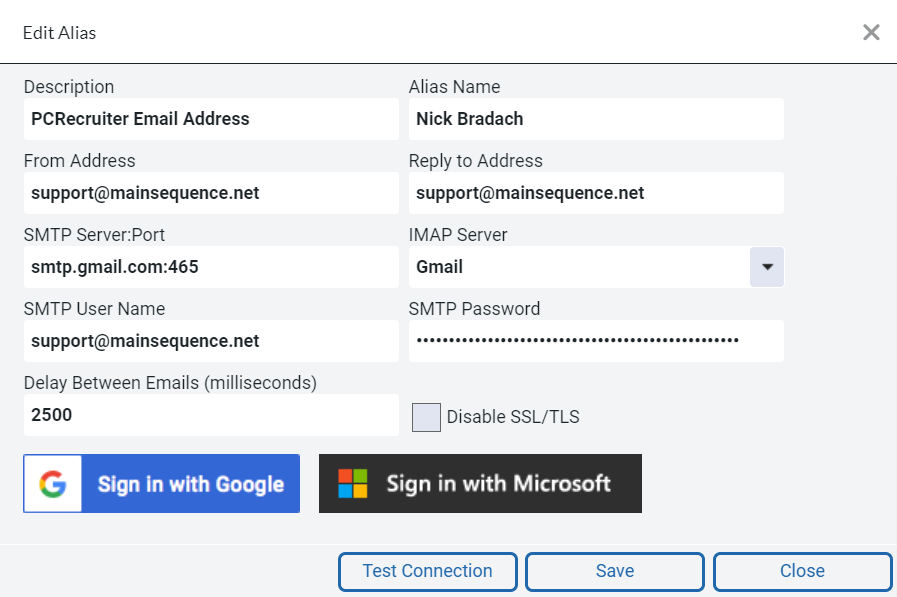
- Sign In with Google: If your email account is provided by Google / Google Workspace, click this button to authorize PCRecruiter to use your account. NOTE: If you use this option, you do NOT need to fill in the SMTP fields above. (If this does not work follow the troubleshooting steps HERE.)
- Sign In with Microsoft: If your email account is provided by Microsoft / Office 365, click this button to authorize PCRecruiter to use your account. NOTE: If you use this option, you do NOT need to fill in the SMTP fields above. (If this does not work follow the troubleshooting steps HERE.)
- Description: A unique name by which to identify this Alias within PCRecruiter. This description does not appear outside of the system.
- Alias Name: Your name as it should appear to email recipients in the ‘From’ line when sending messages from this Alias.
- From Address: Your email address. This will be auto-populated if you use the Google or Microsoft buttons.
- Reply to Address: Specify an optional alternate email address that replies should be directed to when sending from this alias.
- SMTP Server:Port: If you are NOT using a Microsoft or Google email account, enter the SMTP server name and port here. For example, mail.myserver.com:465. If you are not sure of your SMTP server details, check your email service provider’s documentation.
- IMAP Server: If you have IMAP servers for Incoming Email configured in PCRecruiter, select one to associate with this Alias. This will allow emails sent from this alias to appear in the Sent Items for the appropriate account.
- SMTP User Name: If you are NOT using a Microsoft or Google email account, manually enter your email account’s username here. This is often your email address, but it may be only the part preceding the @ or it may be something else entirely. Check your email service provider’s documentation.
- SMTP Password: If you are NOT using a Microsoft or Google email account, manually enter your email account’s password here. This is the password that accompanies the user name entered in the SMTP User Name box and not the password you use to log into PCRecruiter. If you are unsure of your email password, check with your email provider.
- Disable SSL/TLS: Only for use with specific, non-secure email server configurations. This is rarely checked.
- Make Default: If more than one Alias is present, checking this box will flag this Alias as the primary account to send from by default.
- Delay Between Emails (milliseconds): This setting forces a delay between each email when sending a Form Letter to multiple recipients via a Bulk Email or Campaign. This is typically used with outgoing servers that enforce a rate limit or quantity limit to prevent abuse. For example, if your email provider has a rate limit of 30 emails per minute, you would want to enter 2500 into this box to put a 2.5 second pause between mails. Check with your email provider’s documentation for specific rate, recipient, or quantity limits on mass-mails before sending! If you plan to send large quantities of email, you may wish to engage a bulk email SMTP provider.
- Click Test Connection to verify that your account is working. A “Status: OK” message appears if the connection is functioning properly. If your email credentials should change, you will need to re-authenticate in PCRecruiter.
- Click Save to update the settings.
Gmail App Password #
You must enable 2 Factor Authentication and create an App Specific Password so that PCRecruiter can securely connect to your email account.
- Go to your Google Account.
- Select Security.
- Under ‘How you sign in to Google’, select 2-Step Verification.
- At the bottom of the page, select App passwords.
- Enter a name that helps you remember where you’ll use the app password, e.g. “PCR”.
- Select Generate. A 16-character code will appear. Make note of this.

- Select Done.
- Complete the Email Alias details in PCR:
- Enter the Mail Server Details:
- From Address: Your Email Address
- Reply To Address: Your Email Address
- SMTP Server:Port: imap.gmail.com:465
- Password: The 16-character App Specific Password you created earlier, omitting any blank spaces.
- SMTP User Name: Your Email Address
- Delay: 2500
- Click Test Connection to verify the Alias
- Click Save
Office 365 App Password #
Before using Microsoft 365 accounts with PCRecruiter, verify that the Authenticated SMTP setting is enabled for the user:
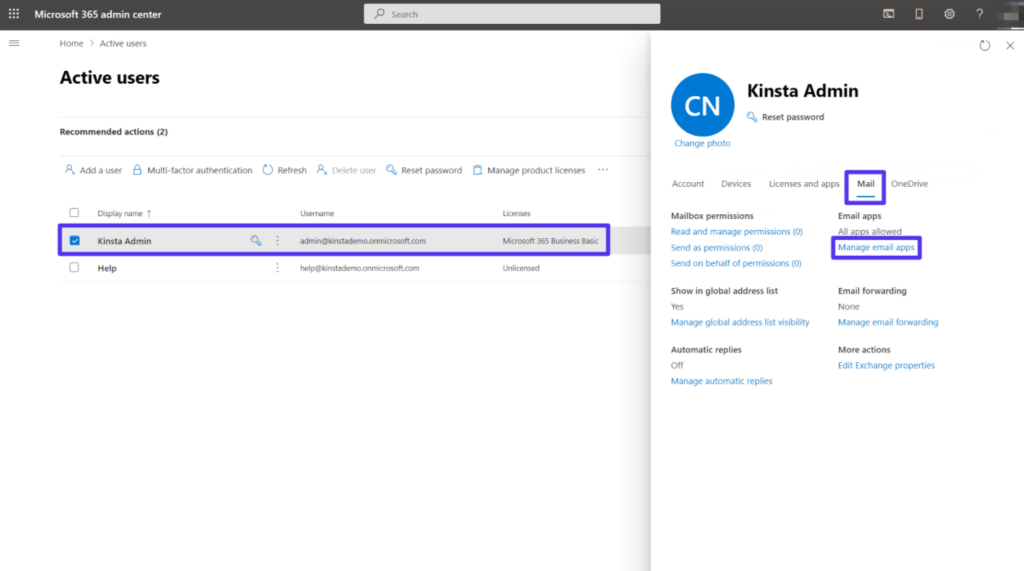
- Open the Microsoft 365 admin center
- Open Users > Active users.
- Select the desired user
- In the flyout that appears, click Mail.
- In the Email apps section, click Manage email apps.
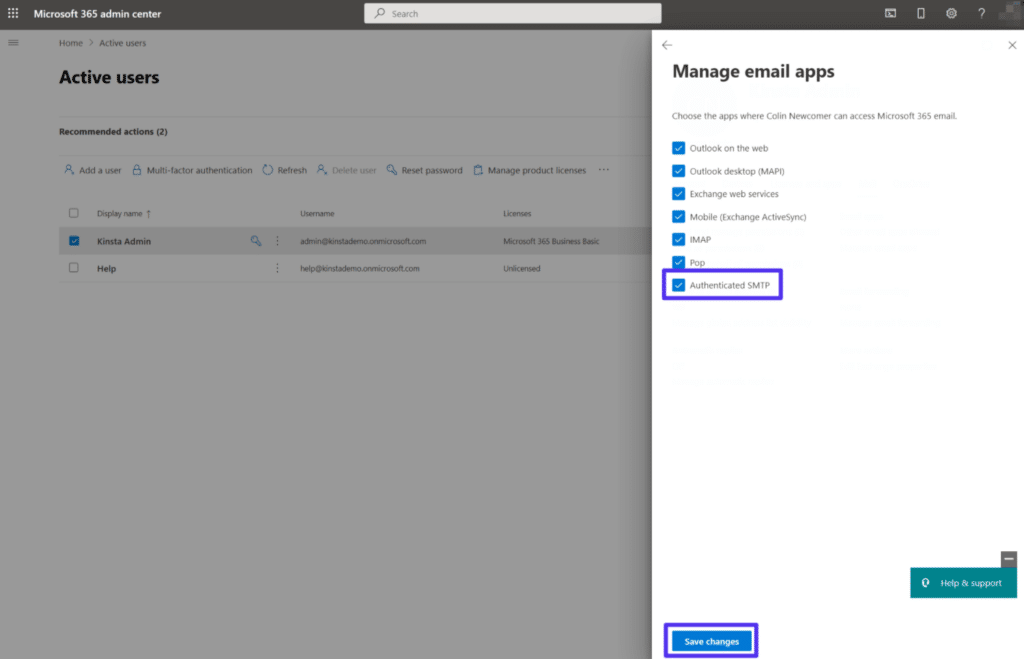
- Verify that the Authenticated SMTP setting is checked
- Save
Now that this is enabled you can retry the “Sign into Microsoft” button. If this still does not work please follow the instructions below for creating an App Specific Password in your Microsoft account.
- Make sure 2 Factor Authentication is turned on in your Office 365 account. This must be done by an Admin.
- Sign in and go to Advanced Security Options
- Navigate to Additional Security and Two-Step Verification
- Here you can Turn On the two factor settings.
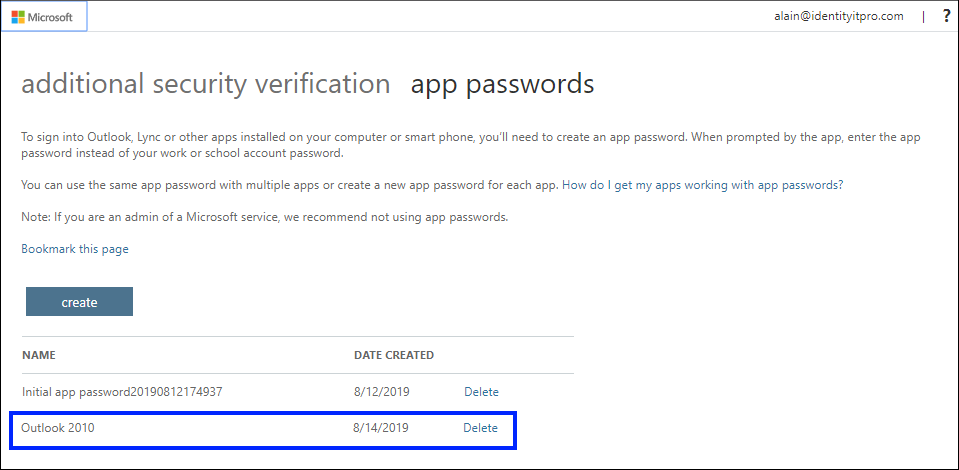
- Sign in to the Additional security verification page, and then select App passwords.

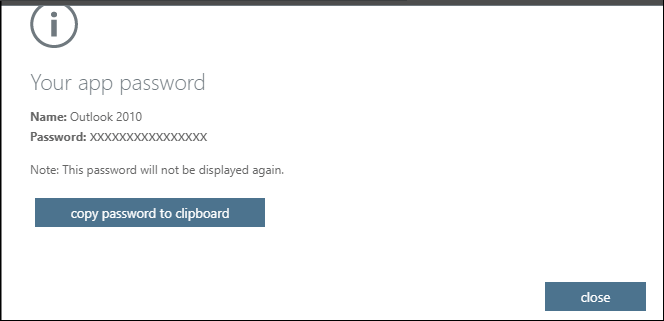
- Select Create, type the name of the app that requires the app password, and then select Next.

- Copy the password from the Your app password page, and then select Close.
- On the App passwords page, make sure your app is listed.
- The App Password should be pasted into the Password field in addition to the following information.
- From Address: Your Email
- Reply To Address: Your Email
- SMTP Server:Port: SMTP.office365.com:587
- SMTP Username: Your Email
- Password: App specific Password you just created
- Delay: 2500
- Click Test Connection and then Save.