The Zoom Phone integration allows for users to set up Zoom as their auto dialer for use inside of your database. This will act as a direct integration for all calls prompted within the system. For a short video on our Zoom integration click HERE.
The integration will write incoming and outgoing call activities for calls triggered directly from your Zoom app or when using the click-to-dial option inside of the PCR application.
Please note that the phone number being called must be on a record in PCR in order for the activities to be written automatically. Additionally, you will need need a paid Zoom account to use this integration.
At this time, Zoom only supports voice dialing out of PCR and not SMS integrations. If you’re interested in having SMS capabilities check out our RingCentral integration.
Zoom Setup Instructions #
The Zoom integration feature must be activated for your database. If you do not see the options described below, please contact your account representative or support.
Turning on the Zoom Dialer in the database #
The initial authentication of Zoom with PCRecruiter must be done twice for each user.
- First, the Zoom integration must be authenticated from the User Record which can only be done by an Admin User. This allows automatic Activity sync to occur.
- Second, the Zoom integration must be authenticated on the user’s own computer the first time they log in post-authentication. This allows caller ID popups to occur on their browser when an inbound Zoom call matches a known number.
Because the User Record area is not accessible to non-admin users, the first authentication will require that you do one of the following:
- Set the user’s System Administrator security setting to “User Records, Locations” temporarily, allowing them to access their user account directly.
- Authenticate with Zoom on the user’s behalf while logged in as an administrator. This will require knowing their Zoom account login information. You will also need to authenticate each user from a new Incognito Window since your previous login will be retained on the current browser session.
While logged in with the proper permissions, do the following:
- Open System in the main menu.
- Navigate to the Users section
- Click Manage Users

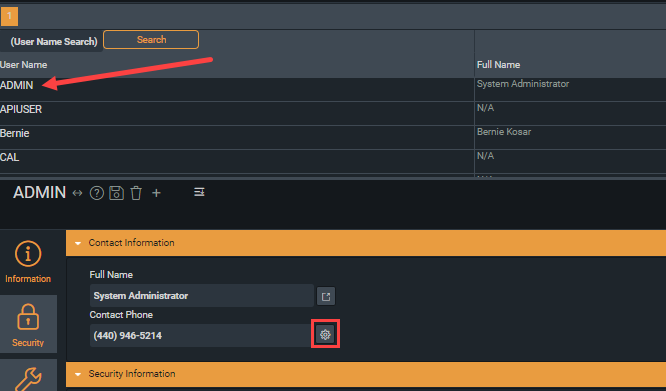
- Select the User Name of an administrative user (typically ADMIN)
- Under Contact Information, click on the Gear Icon to the right of the Contact Phone field.
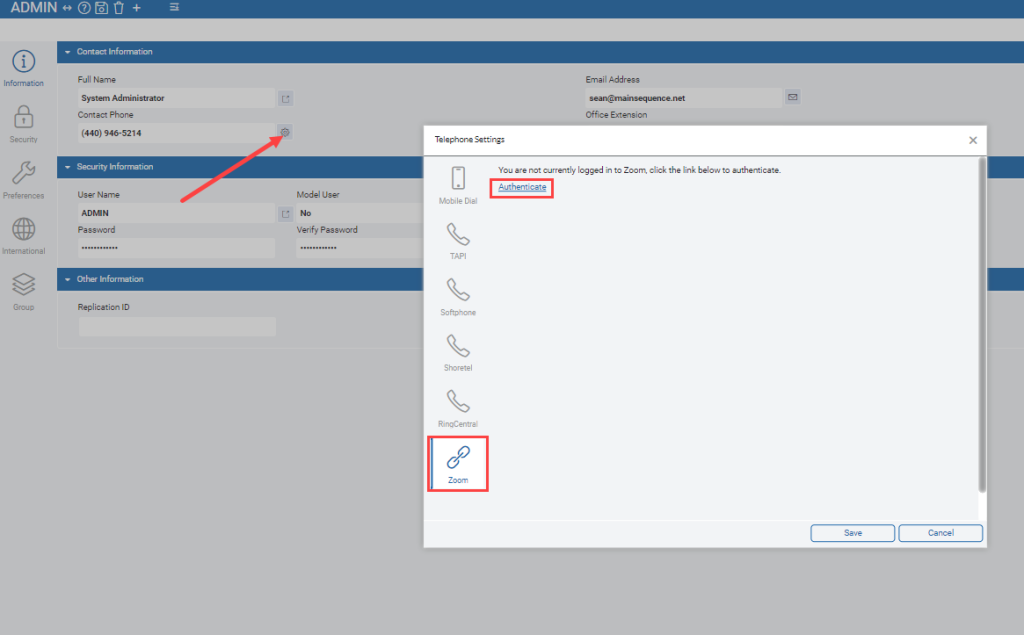
- Click the Zoom option on the left side of the pop-up window.
- Click Authenticate.
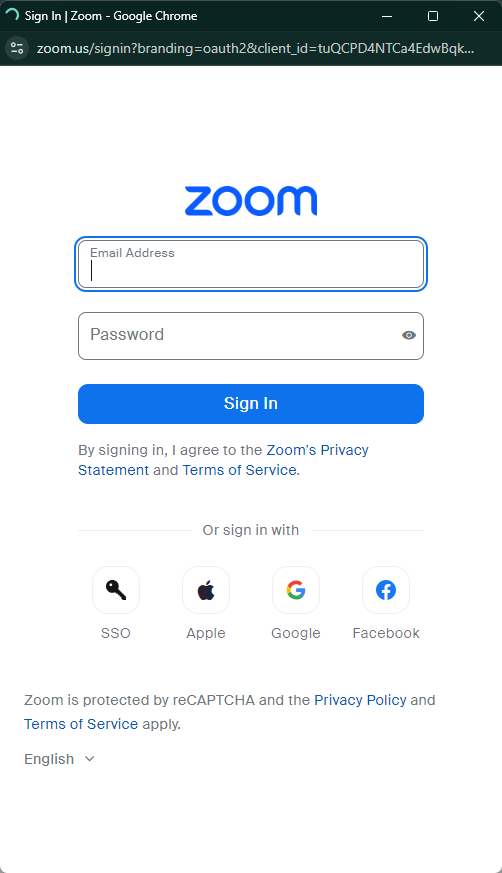
- In the pop up window, sign in using your Zoom Credentials.
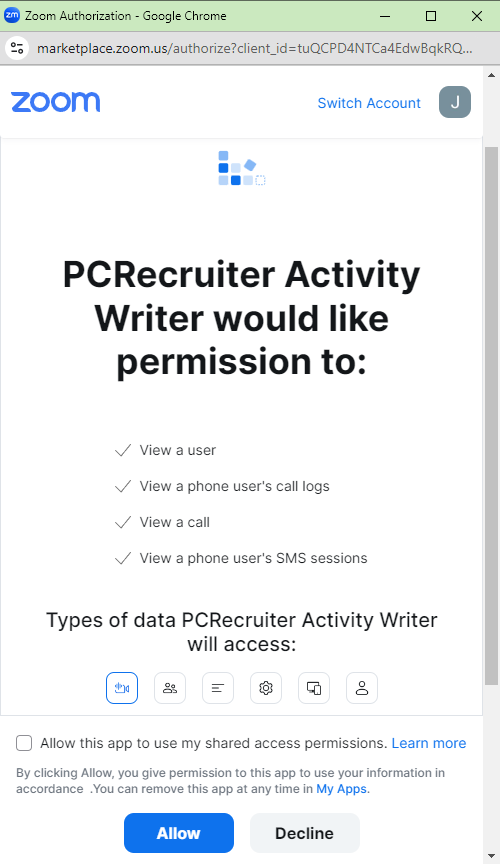
- Click the Allow Checkbox AND the Allow button at the bottom of the window to give PCR access.
- Click SAVE on the PCRecruiter User Record.
User Setup #
- Ensure that the Zoom app has been installed on the computer and that you are logged in. The Zoom app must be open or running in the background to be able to dial out.
- Log in to the PCRecruiter account.
- A popup notification should appear at the lower right., prompting authentication with the Zoom account. Click sign in here to open the Zoom authentication window. (If you do not see the notification pop up, click on the notification icon in the top right of the screen. Also, verify that Chrome Notifications are enabled for https://www2.pcrecruiter.net.)
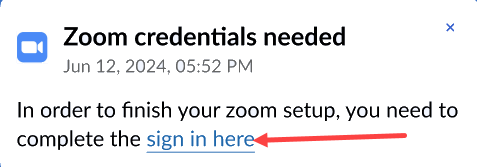
- Click Sign in and enter the Zoom credentials.
When dialing out for the first time you will see a Chrome notification that asks permission for PCRecruiter to open the Zoom application. Check Always Allow and then click Open Zoom Meetings to launch the dialer.
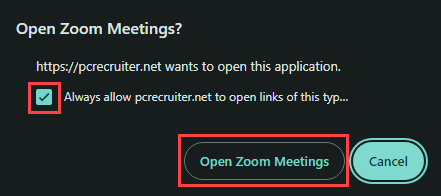
You can now use the Zoom dial function from anywhere in the PCR database.
Dialing out from PCR #
Click-to-dial from PCR can be launched from four areas, each of which have been described below:
- Name/Company/Position Record
- Click the phone icon to the right of any phone field.

- From the ‘Call’ Action menu item on a record.
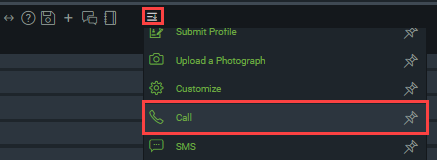
- Click the phone icon to the right of any phone field.
- Record Card
- On a Recently Viewed Record Card, click on the phone icon to open an Activity window. Click the number you want to call. (If you do not see the icon, you can edit the record card icons from the System menu).

- On a Recently Viewed Record Card, click on the phone icon to open an Activity window. Click the number you want to call. (If you do not see the icon, you can edit the record card icons from the System menu).
- Pipeline
- From a Candidate Record Card, click on the phone icon to open an Activity window. Click the number you want to call. (If you do not see the icon, you can edit the record card icons from the System menu).

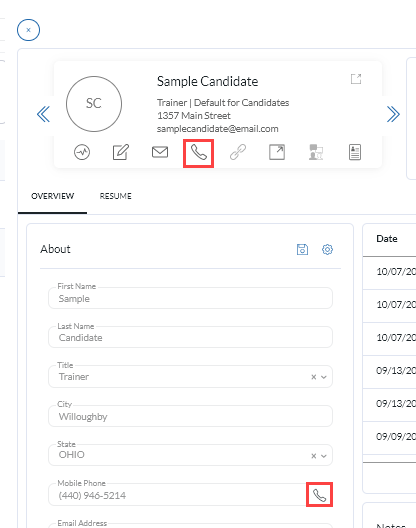
- From the Candidate record flyout, click the phone icon found on the Record Card or next to a phone field value.
- From a Candidate Record Card, click on the phone icon to open an Activity window. Click the number you want to call. (If you do not see the icon, you can edit the record card icons from the System menu).
- Sequencing
- From the Candidate record flyout, click the phone icon found on the Record Card or next to a phone field value.
- From the ‘Dial’ action on a Call Task.
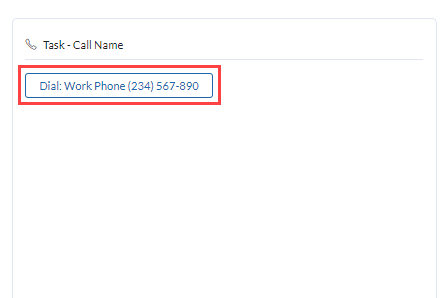
- From the Candidate record flyout, click the phone icon found on the Record Card or next to a phone field value.
Incoming Call Notification #
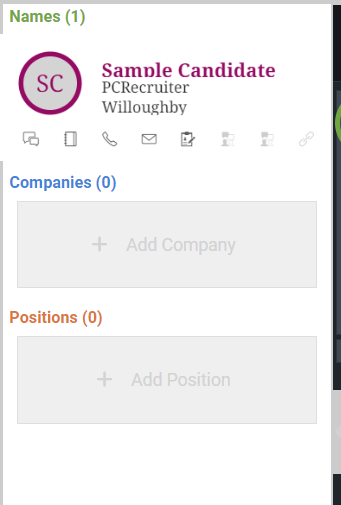
A Notification will appear in the bottom right corner of your window when there is an incoming Zoom call.
- If multiple records matching the phone number exist, the record with the most recent activity will appear.
- If the phone number is found on both Names and Companies, the Company record will be favored in the popup.
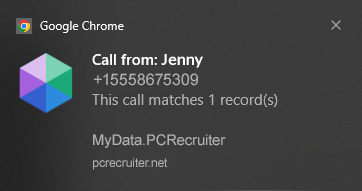
Clicking on the notification will launch a window with the matching records.
- The top three will be shown (in order of most recent activity)
- The ‘More Records’ option will show additional items up to a maximum of 50 per record type.
- The << icon will collapse the sidebar to increase screen space if needed.
- If no records match, the option to add a new record will be presented.
Turning on Chrome Browser Notifications #
Browser notifications in Chrome must be set to allow notifications in your settings. Click HERE for instructions on turning on browser notifications. If your settings are already turned on or you do not get the red notification below you can skip this step.
- When logging in to a database for the first time after Zoom has been enabled, the user will receive a PCR notification that prompts them to enable those notifications within Chrome.

- Click on the link in the notification to prompt the Chrome Browser to enable notifications from PCRecruiter.
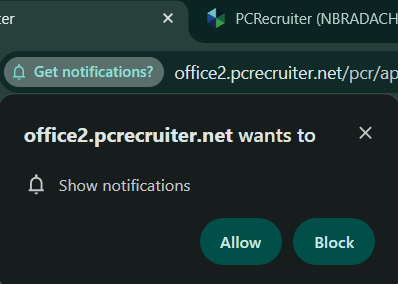
- Click allow to enable Chrome Notifications on the PCR webpage. This will allow you to receive the CallerID popup notification from Zoom when an incoming call occurs.
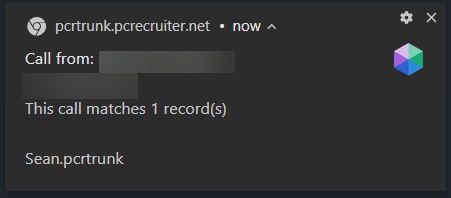
- If you click on these notifications a PCR screen will open which displays any records with a matching phone number in your database, allowing you to quickly navigate to their record or to add a new record with that phone number to your database.
Notification Troubleshooting #
- Browser notifications in Chrome must be set to allow notifications in your settings. If your settings are set to block notifications then you will see the PCR notification below. Click HERE for instructions from Google.
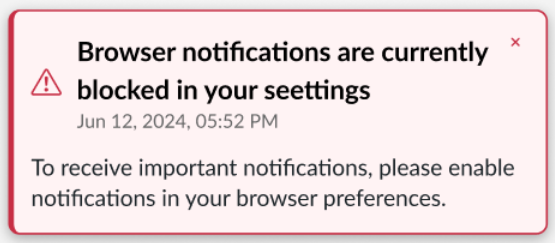
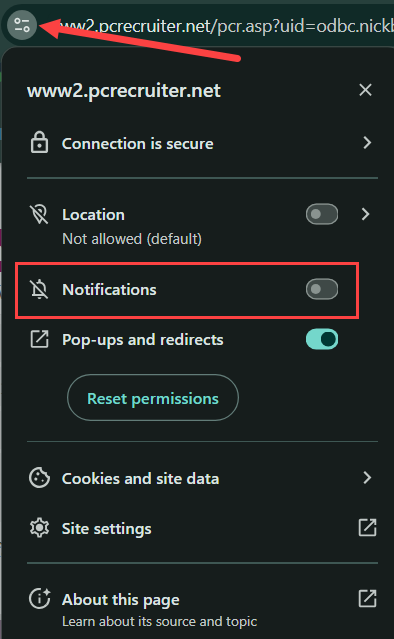
- If you accidentally dismiss this notification or do not see it pop up in your browser you can also click the “View Site Information” icon to the left of the URL at the top of the browser window from any PCR page and select the toggle to turn on these notifications.
Activities #
When dialing out of PCR, an Activity window will pop up to prompt the user to take notes or record their calls. This is where you’ll mark down the type of call and the content discussed. These Activities are manually generated and separate from the automatic ones written by the Zoom integration.
The integration will log Activities for all voice communications made through your Zoom account.
Please note that this will only work in one database at a time. If a user has accounts in more than one PCR database it will only write Activities for the most recently authenticated database.
- Activity Type: INBOUND
- Result Codes: MISSED, RECEIVED, VOICEMAIL
- Activity Type: OUTBOUND
- Result Codes: CONNECTED, NO CONNECT
Activities are created on a periodic sync with Zoom’s servers and may not appear in your database immediately. If you experience continued issues please reauthenticate your Zoom credentials or reach out to support for assistance.
Removing or Reauthenticating Zoom Integration #
Follow these directs to remove the connection between PCR and Zoom. This can be used for troubleshooting or if you no longer wish to utilize this integration.
- Open System in the main menu.
- Navigate to the Users section
- Click Manage Users

- Select the User Name of an administrative user (typically ADMIN)
- Under Contact Information, click on the Gear Icon to the right of the Contact Phone field.

- Click the Zoom option on the left side of the pop-up window.
- Click Revoke.
- Repeat login steps shown above if reauthenticating.
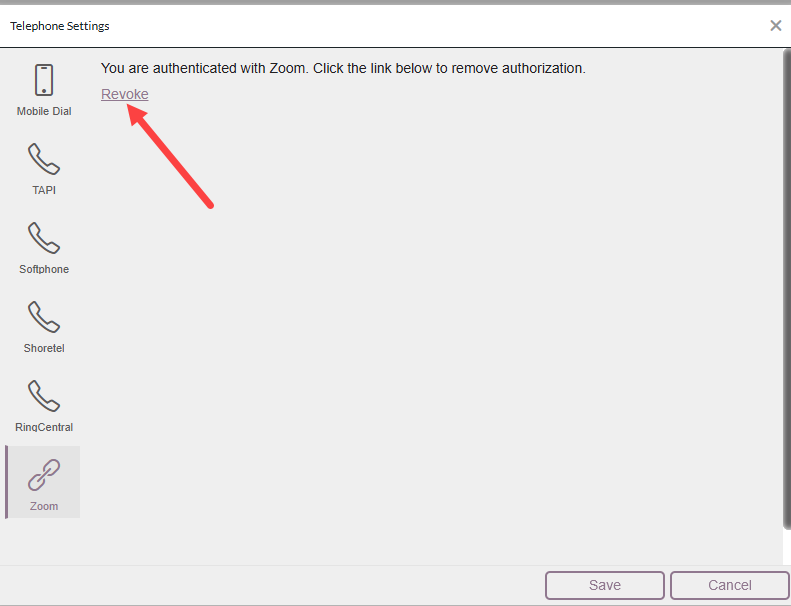
If you are no longer using the integration you can remove it from your Zoom account with these instructions. This will stop activities from being written in PCR.
- Log in to your Zoom account and navigate to the Zoom App Marketplace.
- Click Manage >> Added Apps or search for the “PCRecruiter Activity Writer” app.
- Select the “PCRecruiter Activity Writer” app.
- Click Remove.

