RingCentral Setup (Administrator Steps) #
To enable RingCentral for the database please reach out to your account manager or to our support team. They will be able to assist you with turning on the RingCental integration option within your database. Please note that this must be done prior to any user setup in the instructions below.
Set Phone Configuration for Users #
Please note that this is a one-time step that must be enabled by an administrator.
- Select System from the main menu.
- Select Users
- Choose Manage Users
- Select the User Name you wish to enable RingCentral for.
- Select the Gear configuration icon next to the Contact Phone field.
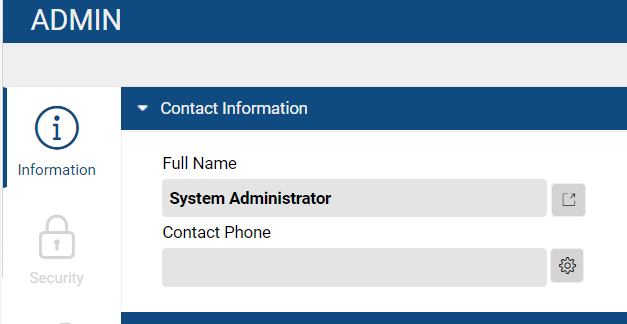
- In the Telephone Settings panel, select RingCentral
- Enter the user’s direct number in the Phone Number and Direct Dial Number fields. The number must be entered in the +1 format as shown below. Do not add the extension.
- Set the User Phone Configuration dropdown to RingCentral App (unless using an IP Phone)

- Click Save.
- If you are setting up for yourself or have the person’s RingCentral password, you can click Authenticate to login to their RingCentral account to authorize the connection. Or, have the user follow the next set of steps for authenticating from the MyPCR screen.
RingCentral Setup (Steps for the User) #
Download the RingCentral app #
Each user who will be using RingCentral will need to download and install the RingCentral app:
- PC (Windows): https://app.ringcentral.com/download/RingCentral.exe
- Mac: https://app.ringcentral.com/download/RingCentral.pkg
Authenticating from the MyPCR Screen #
Once a user’s RingCentral settings have been entered by an administrator, the user can authenticate their account via the MyPCR screen
- Select MyPCR from the Main toolbar
- Select “You are not authenticated with RingCentral, click here to login.”
- Enter your Email or Phone number that is associated with your RingCentral account (or utilize one of their SSO options)
- Click Next
- Enter your RingCentral Password
- Click Sign In
- Click Authorize

Using RingCentral in PCRecruiter #
Dialing/Texting #
Using click to dial to call out of PCR can be done in a number of different ways, each of which have been described below.
- Name/Company/Position Record
- Click the phone icon to the right of any phone field. (SMS also available here)

- From the actions icons of a record click on the phone icon or click the options menu and select call from the list. (SMS also available here)
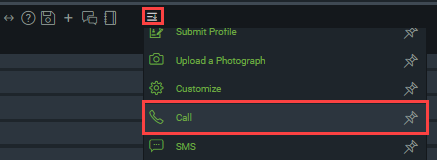
- Click the phone icon to the right of any phone field. (SMS also available here)
- Record Card
- From a recently searched record card click on the phone icon to open an activity window then click the number you want to call. (If you do not see the icon you can edit the record card icons from the system menu)

- From a recently searched record card click on the phone icon to open an activity window then click the number you want to call. (If you do not see the icon you can edit the record card icons from the system menu)
- Pipeline
- From a Candidate record card click on the phone icon to open an activity window then click the number you want to call. (If you do not see the icon you can edit the record card icons from the system menu)

- From the Candidate record flyout click the phone icon from a phone field or the record card. (SMS also available from phone field.)
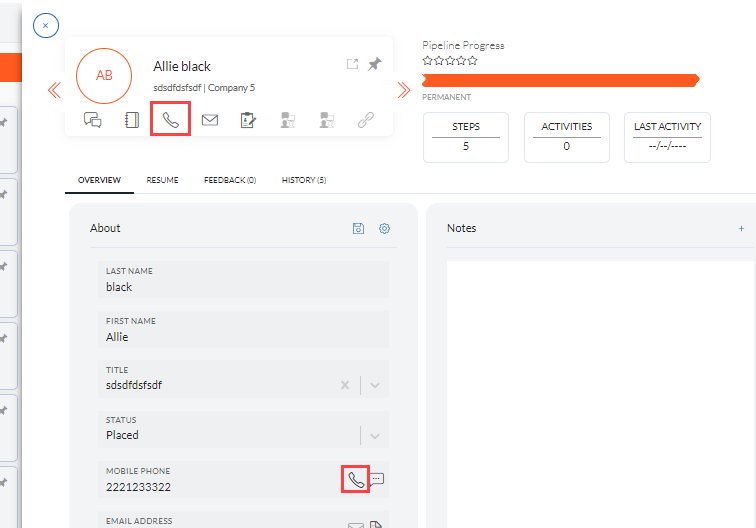
- From a Candidate record card click on the phone icon to open an activity window then click the number you want to call. (If you do not see the icon you can edit the record card icons from the system menu)
- Sequencing
- From the Candidate record or field list icons. (SMS also available from phone field)
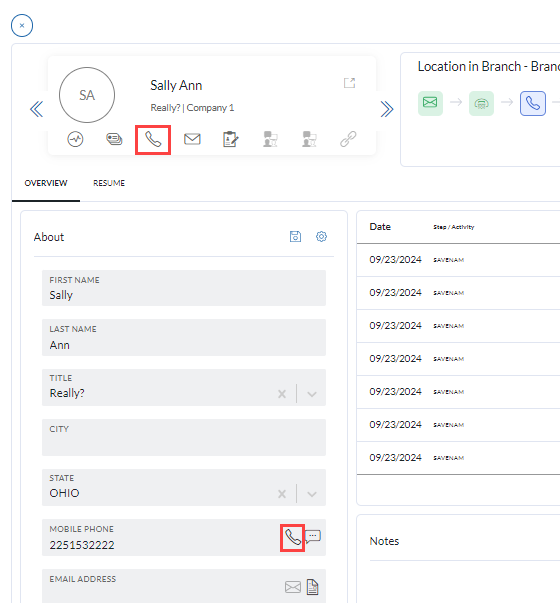
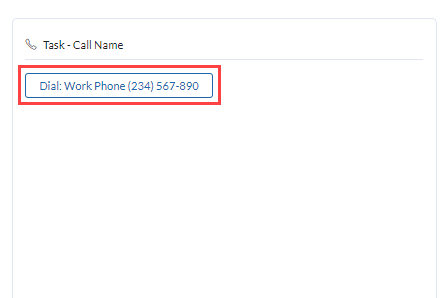
- From the action pane of a Call task. These tasks can also send both manual and automatic SMS messages.
- From the Candidate record or field list icons. (SMS also available from phone field)
Incoming Call Notification #

A Notification will appear in the bottom right corner of your window when there is an incoming call. If multiple records matching the phone number exist, the record with the most recent activity will appear. If the phone number is found on both Names and Companies, the Company record will be favored in the pop-up.
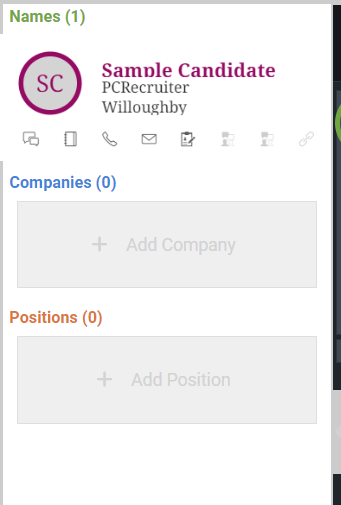
Clicking on the notification will launch a window with the matching records. The top three will be shown (in order of most recent activity) and the ‘More Records’ option will show additional items up to a maximum of 50 per record type. The << icon will collapse the sidebar to increase screen space if needed. If no records match, the option to add a new record will be presented.
Incoming Call Notification Setup #
RingCentral Settings #
- Open your Ring Central app.
- Click Settings at the bottom left
- Click Phone.
- Scroll down to the General section.
- Enable Launch an external app or website for incoming calls.
- Click Manage.
- In the Enter command field, paste the statement below depending on your operating system (Windows or Mac)
Windows:
"C:/Program Files (x86)/Main Sequence Technologies/PCRecruiter Launcher/ControlLoader.exe" "pcr:action=ringcentral&ver=latest&formattednumber=%P&lastname=%L&fullname=%N&firstname=%F&callednumber=%D&fullnumber=%C&standardizednumber=%E"Mac:
open "/Applications/pcrurl.app" "pcr:action=ringcentral&ver=latest&formattednumber=%P&lastname=%L&fullname=%N&firstname=%F&callednumber=%D&fullnumber=%C&standardizednumber=%E"Browser Settings #
Browser notifications in Chrome must be set to allow notifications in your settings. Click HERE for instructions on turning on browser notifications. If your settings are already turned on or you do not get the red notification below you can skip this step.
- When logging into a database for the first time, after the update that has RingCentral enabled, the user will receive a PCR notification that prompts them to enable those notifications within Chrome.

- Click on the link in the notification to prompt the Chrome Browser to enable notifications from PCRecruiter.
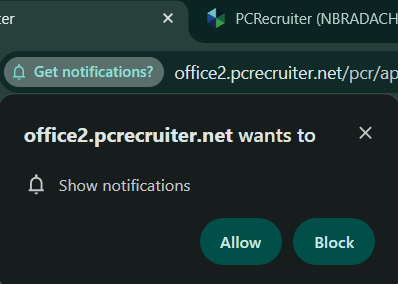
- Click allow to enable Chrome Notifications on the PCR webpage. This will allow you to receive the CallerID pop-up notification from RingCentral when an incoming call occurs.
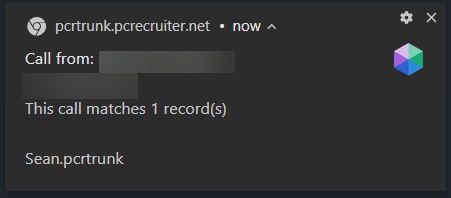
- If you click on these notifications, a PCR screen will open which displays any records with a matching phone number in your database. This allows you to quickly navigate to their record or to add a new record with that phone number to your database.
Notification Troubleshooting #
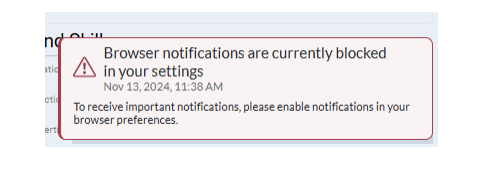
- Browser notifications in Chrome must be set to allow notifications in your settings. If your settings are set to block notifications then you will see the PCR notification below. Click HERE for instructions from Google.
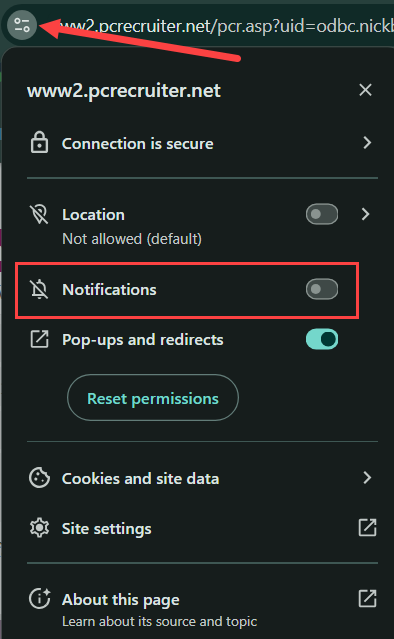
- If you accidentally dismiss this notification, or do not see it pop up in your browser, you can also click the “View Site Information” icon to the left of the URL at the top of the browser window from any PCR page and select the toggle to turn on these notifications.
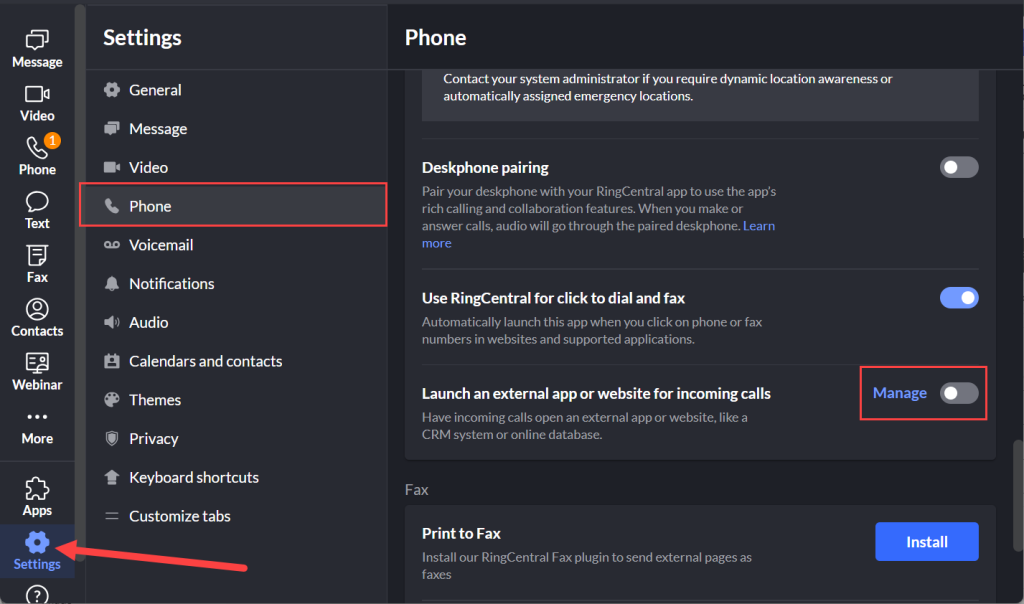
- If notifications have been enabled and you are still not receiving these notifications, you may need to adjust your previous settings from your RingCentral app using the following directions.
- Open your RingCentral app.
- Click Settings.
- Choose Phone.
- Scroll down to the General section.
- Disable the toggle for the ‘Launch an external app or website for incoming calls’ function.
Activities #
PCRecruiter will log activities for all text and voice communications made through your RingCentral account.
- Activity Type: INBOUND
- Result Codes: MISSED, RECEIVED, VOICEMAIL
- Activity Type: OUTBOUND
- Result Codes: CONNECTED, NO CONNECT
- Activity Type: SMS
- Result Codes: Inbound, Outbound
Activities are created on a periodic sync with RingCentral’s servers and may not appear in your database immediately.
