Table of Contents
The ‘Email Settings’ area of PCR is a consolidated panel that offers consolidated access to a variety of email configurations:
- Incoming Email: Add/edit your incoming email accounts for sync with automatic activity logging.
- Email Folders: Map your incoming email’s Sent, Trash, and other folders to PCR.
- User Outgoing Email: Add/edit your outgoing email accounts and aliases.
- Display Settings: For PCR’s internal email client, set messages per page and other preferences.
- Signature: Manage the HTML email signature used for emails and form letters.
- Default Font: Choose the ‘base font’ for your emails to use when none is specified in the content.
- Bulk Email Categories*: Select your active categories for reporting on mass-email sends.
- Activities: Enable IMAP email logging and choose emails to exclude from activity logs.
- Opt In/Opt Out List*: View and manage the email opt-in and opt-out list.
- Private Email*: Define specific email addresses to be excluded from any Activity records for emails sent to or from, or containing that email address in the body.
- Outgoing Database*: Configure the main email account that PCR will use for sending automated notifications and other non-user-specific communications.
PCRmail Configuration #
Complete all four steps to configure receiving, sending, and email activity tracking.
Opening the PCRMail Configuration Screen #
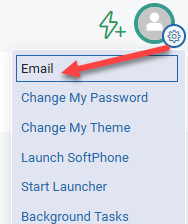
- In PCRecruiter, click the gear icon in the top-right corner (next to your profile image).
- Select Configure at the top of the menu. The Email Settings screen will open.
Incoming Email Setup #
This section configures how PCRmail receives emails and enables ‘EMAILRECD’ activity logging and reply/bounce tracking for bulk email campaigns.
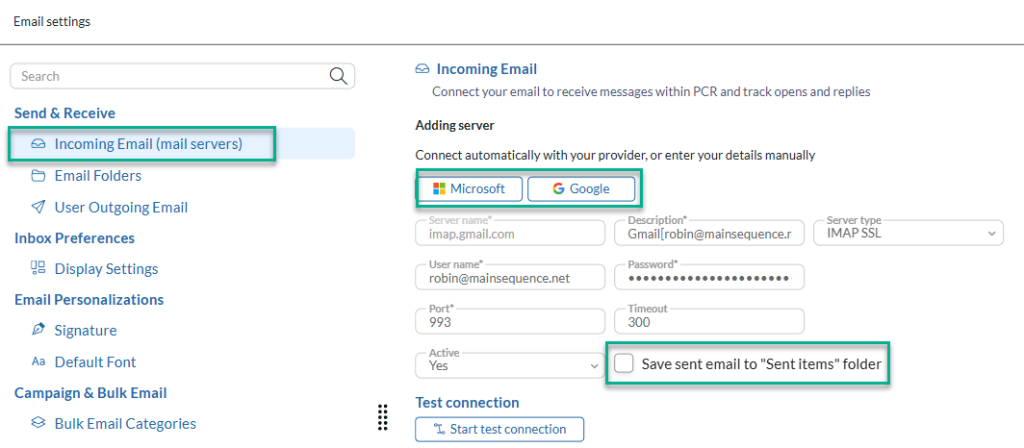
- Click Incoming Email in the left menu.
- Click Add Server.
- Sign in to authenticate your IMAP Server:
- Gmail: Click the Google option to authenticate with your Gmail account. You will be returned to the Incoming Mail screen once authentication is complete.
- Office 365: Click the Microsoft option to authenticate with your Office 365 account. You will be returned to the Incoming Mail screen once authentication is complete.
- Uncheck Save sent email to the Sent Items folder. Your mail provider saves sent emails automatically, so leaving this enabled can create duplicates in your Sent folder.
- Click Start test connection. If the test passes, click Save.
Email Folders #
You must map your mail server’s Sent and Trash folders before the sync can begin.
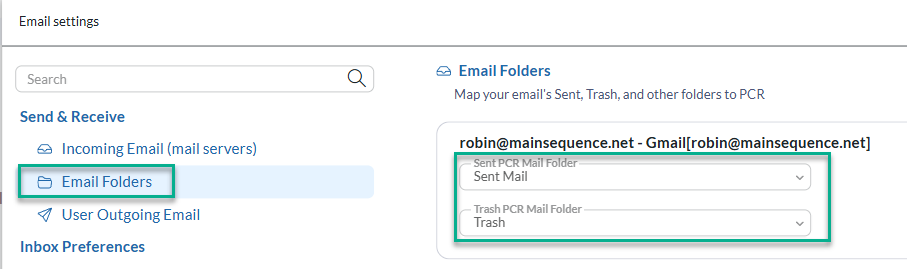
- Click Email Folders in the left menu.
- Select your Mail Server’s Sent and Trash/Deleted Items folders:
- Gmail: Select Sent Mail for the Sent folder and Trash for the Trash folder.
- Office 365: Select Sent Items for the Sent folder and Deleted Items for the Trash folder.
- Click Save.
Note: The initial sync starts after these folders are selected and may take a significant amount of time depending on how many emails are stored on your mail server.
User Outgoing Email Setup #
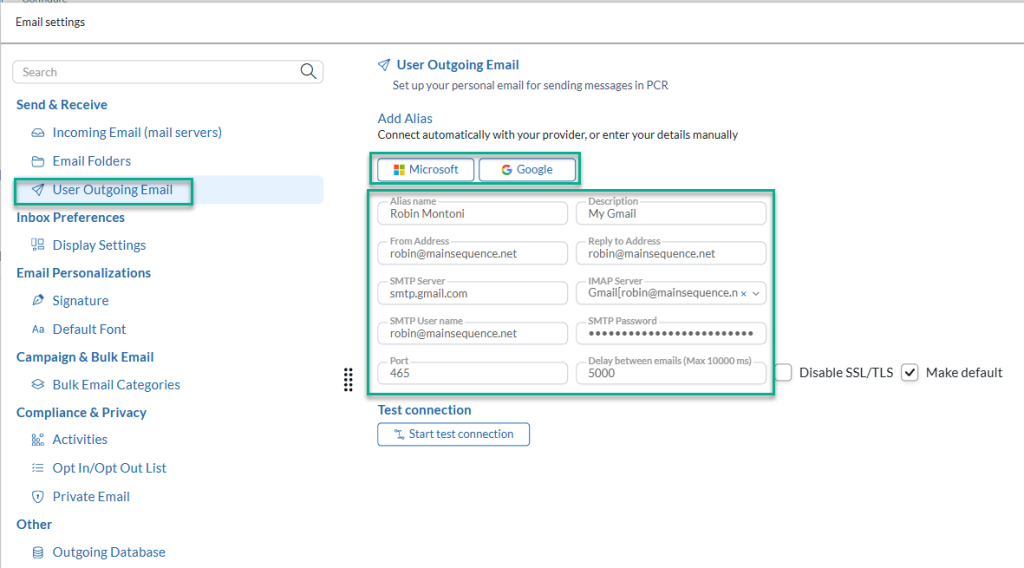
- Click User Outgoing Email in the left menu.
- A card is created when your user account is set up. Click the edit (pencil) icon on the card.
- Set the Alias Name to your full name. This is the display name recipients will see when you send an email.
- Ensure both the From Address and Reply To Address fields are populated.
- Use the IMAP Server dropdown to select the server created in the earlier step. This syncs emails sent from PCRecruiter to the Sent folder of your IMAP Server.
- Set a Delay Between Emails. We recommend 3000 or 5000 ms (3–5 seconds) to stay under typical sending rate limits for Microsoft and Google SMTP.
- Sign in to authenticate your SMTP Mail Server.
- Gmail: Click the Google option to authenticate. This automatically populates the SMTP Server, SMTP Username, SMTP Password, and Port fields.
- Office 365: Click the Microsoft option to authenticate. This automatically populates the SMTP Server, SMTP Username, SMTP Password, and Port fields.
- Click Start test connection. If the test passes, click Save.
Email Activity Writing #

- Click Activities in the left menu.
- Change the Write incoming emails to activities dropdown from None to From, Subject, Body.
- Click Save.