Rollup Lists allow you to select a symbol as a visual indicator of where the record is in your process. Each type of Rollup (Company, Name or Position) can have its own set of stages; you can alter the label for each symbol as well as the image displayed to reflect your process or terminology. Additionally, each stage can be configured to automatically write an activity, display the New Activity window in which you can add an activity, or execute an automation plan. This configuration is also available for the Rollup Status Icons in the Legacy Pipeline.
Global Rollup Stages #
Global Rollup Stages can be configured and used database-wide. This feature eliminates the need for each user to create their own stages or have an admin user copy stages to them, and provides consistency throughout the data. An administrative access level user can configure them as follows:
- Select System from the main toolbar
- Select Database Setup
- Select Rollup List Global Stage Setup
- Select the Rollup Stage Function from the dropdown. This will be used to identify the type of rollup list the stages will be used for. By choosing the ‘+’ icon, you can add additional templates, providing a blank set of stages each time a stage is created (e.g. Marketing, Sourcing, Recruiting, etc.)
- Once a template option is selected, select the record type these stages will apply to (Names, Companies or Positions)
- Configure the rollup stages as described below.
Once all of the stages have been configured, switch the Enable Global Rollup Stages toggle to “ON” to enable this feature database wide. It is crucial that the stages are configured prior to enabling this feature or users will not see any configured stages.
If you would like to require users to utilize the global stages (recommended) check the option to Require when Creating New Rollups. Moving forward all lists will utilize the global stages – this will not be retroactive.
Assign Global Stages to a Rollup #
When creating a new rollup list, a user will choose if they would like to assign Global Stages to it, unless required.
- Choose Rollups from the main toolbar
- Choose Add Rollup from the action items
- Enter a Rollup Name
- Change Global Stages to “Yes” (If required, skip this step as this dropdown will not appear)
- Upon doing so, the stage template dropdown becomes available; select the template that should be applied to the rollup stages on that particular rollup list.
- Save your list to begin using your new rollups stages as usual.
Rollup Stage Configuration #
- Select Rollups from the main navigation toolbar
- Select any Rollup List
- From the action dropdown, select Configure
- Click Stage Setup
- Select the Rollup Type (Company, Name or Position).
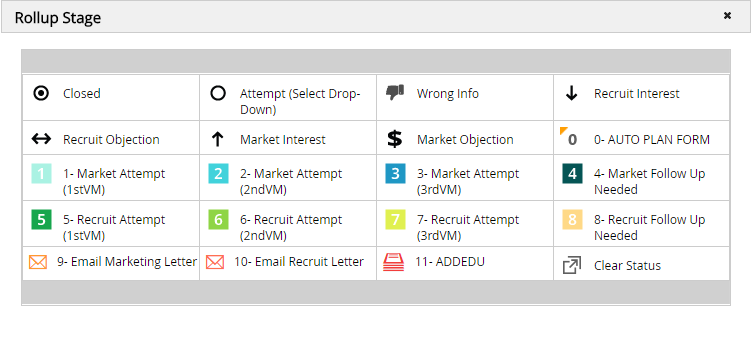
- For each Stage:
- Click the Gear Icon to choose which image you would like displayed when the corresponding stage is selected (This option is not available for the Clear Status stage).
- Enter a Description. The text entered is the label that will appear when selecting the stage (This option is not available for the Clear Status stage)
- Select the Default Activity Type. This is the Activity Type that will be written to the record or displayed as a default if you configure the stage to automatically write or pop up a new activity window (Learn how to create Activity Types here).
- Choose your Write Activity preference (Note: This activity will have appended text listing the Stage the record was changed to and the Rollup List on which the stage was changed):
- Default Activity: Automatically writes the activity selected in the Default Activity column
- Popup New Activity: Pops up the Add Activity window allowing you to add notes and schedule follow ups prior to saving (The selected Default Activity will be displayed).
- Automation Plan: Automatically writes the selected Default Activity as well as runs the selected Automation Plan. If the Automation plan is set to write an activity and a Default Activity is selected, this will result in two activities being written.
- No Activity: Prevents an activity from being written when the stage is selected
- Select the Merge Plan preference to carry forward items with this symbol when using the Merge Plan feature (The Clear Status stage will always be set to ‘Yes’)
- Yes: Records with this stage will remain on your plan to be carried onto the next day
- No: Records set to a ‘No’ stage will fall off of your plan but remain on your rollup list (Useful for people not interested, unable to contact, etc.)
- Click Save
Please note that Rollup Stages can be customized per-user. If the Stages should be applied to other users’ views, you must copy the settings to the other users via System > Users > Copy User Settings.