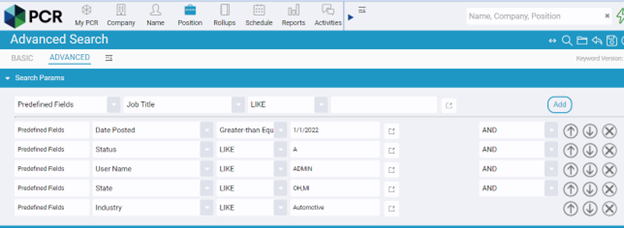
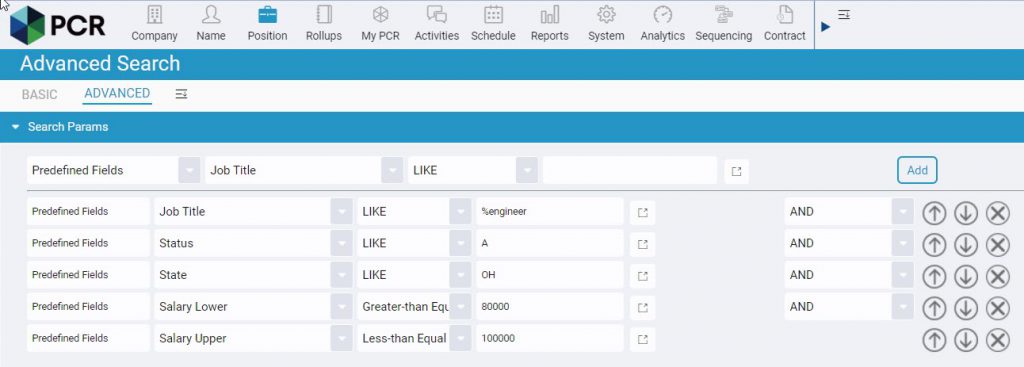
In “Introduction to Record Searching,” we introduced the Advanced Search. Advanced search is the best choice when your search requirements go beyond the capabilities of Basic search. Furthermore, the option to save and open Advanced searches for future use enhances your overall search efficiency and productivity. Here’s how to use this feature:
Using Advanced Search #
- Select Record Type:
- To start your search, click the appropriate icon on the Main Toolbar based on the type of record you’re looking for. You can choose from Company, Name, or Position.
- Access Advanced Search:
- After selecting the record type, click the “Advanced” icon.
- Specify Search Criteria:
- Use the first dropdown menu to specify where you want to search. You can choose from options like Predefined Fields, Custom Fields, or History Fields, Zipcode Radius, or Rollup.
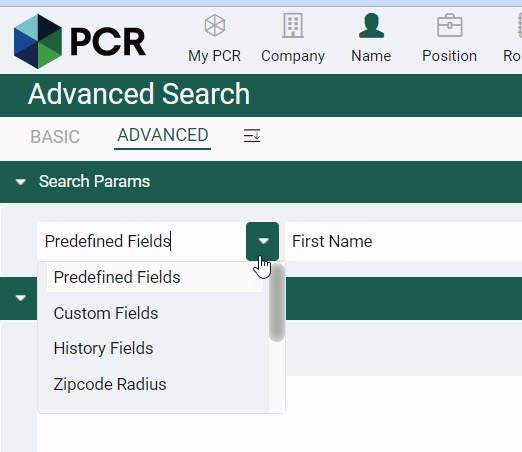
- Define Search Field:
- For Predefined Fields, Custom Fields, or History Fields, use the second dropdown menu to select the specific field you want to search within.
- Specify Search Method:
- In the third dropdown menu, specify the search method, such as “LIKE” or “Greater Than/Equal.” Think of “LIKE” as matching values that start with your specified criteria. You can also use % as a wildcard before the search term if needed.
- Enter Search Value:
- Enter the value you want to search for in the last input box. In many cases, you can use the selector to the right of the input box to choose from values currently in use in your database.
- Generate Query Statement:
- Click “Add” to generate the query statement, which appears in the “Generated Query” box.


You can use “Equal” for an exact match.
- Search Using Zip Code Radius:
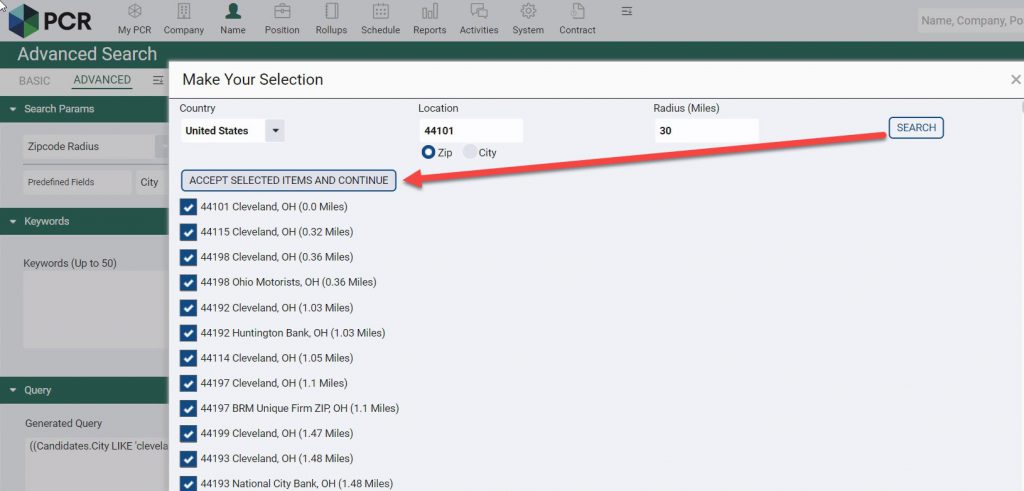
- To search by zip code radius, change “Predefined Fields” to “Zipcode Radius” and click the icon to the right of the field. You can enter the zip code or use city/state search then specify the miles (max 100). After specifying the radius, click “Search” and “Accept Items and Continue”.

- Narrow or Broaden Your Search:
- To narrow your search, use “AND” to specify that both criteria must be met. To broaden your search, use the “OR” operator.

- Organize Search Criteria:
- Organize your search criteria by starting with “OR” statements. To group them, use “END GROUP /AND” to enclose them in parentheses. This helps define complex search logic.
- Refine Results with Additional Criteria:
- Refine your search by adding additional field criteria or being on (or not on) a Rollup List.
- Add Keywords:
- Similar to the Basic search, you can add keywords to limit your results.
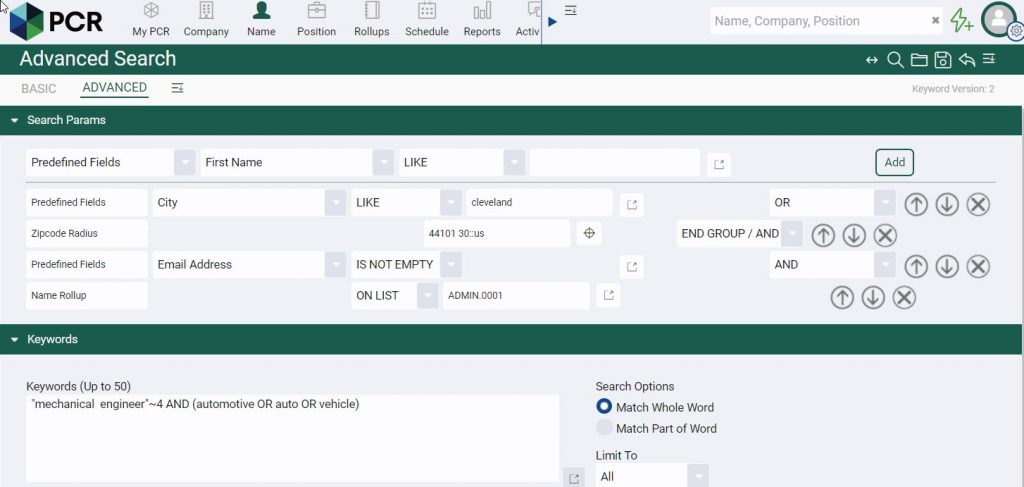
Started with a search based on the City OR Zip Code Radius.
Used ‘END GROUP/AND’ after these two rows.
Further refined the results to include only names with email addresses.
Used ‘AND’ again to narrow down the selection by using a chosen rollup list.
Lastly, refined the search further by incorporating keywords.
- View Search Results:
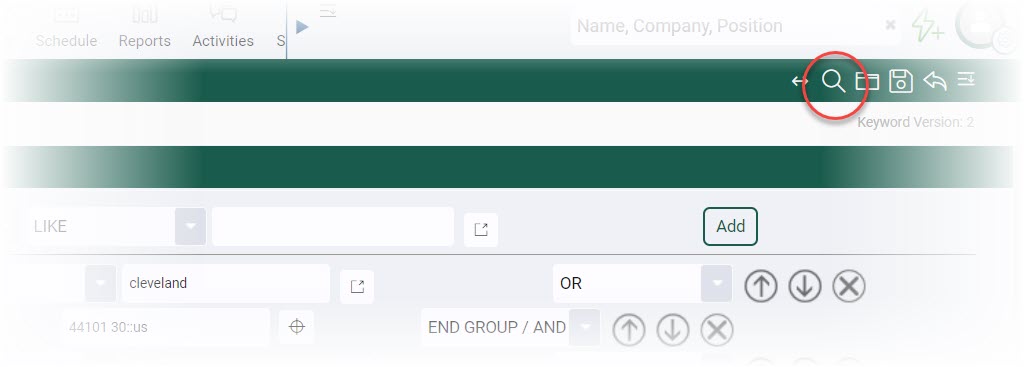
- Click the “Search” action icon to view the results.
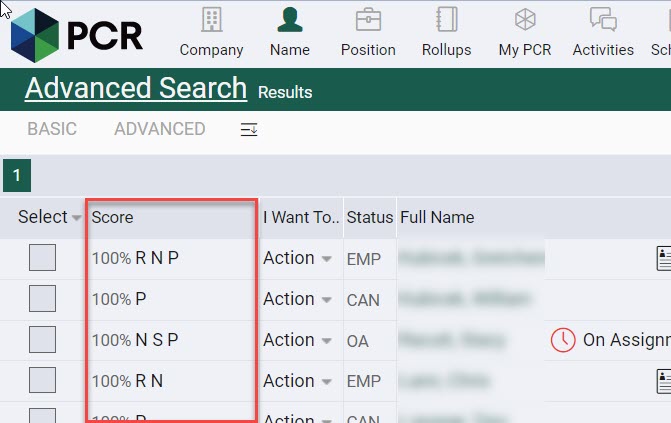
- When your search includes keywords, a ‘Score’ column will be introduced, and the results will be sorted based on their relevance to the specified keywords. The letter in the ‘Score’ column indicates where the keywords were found, and clicking on the letter will display the corresponding area.
Refining Search Queries #
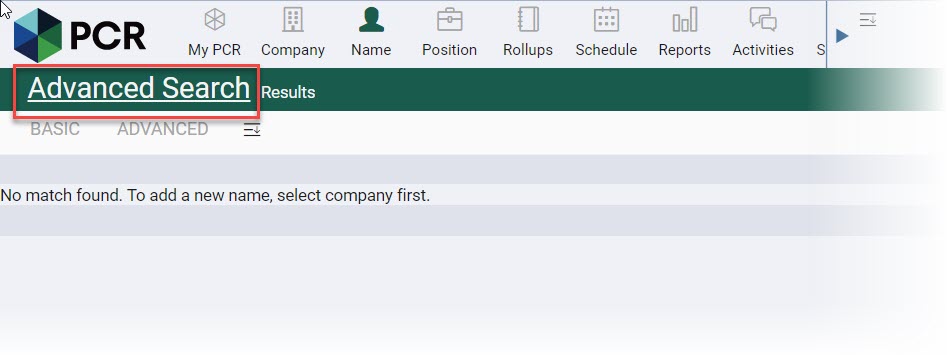
Should you find that your search generates an insufficient or excessive number of results, click the Advanced Search link in the colored heading to edit to your search query for additional refinement.
Modify the query by using the ↑ and ↓ arrows to change the order of statements or use X to remove a statement from the query.

Saving Search Queries #
Take advantage of the Save Search feature to store your search criteria. You can name your saved searches and later use “Open Saved Search” to quickly apply them, making adjustments as needed.
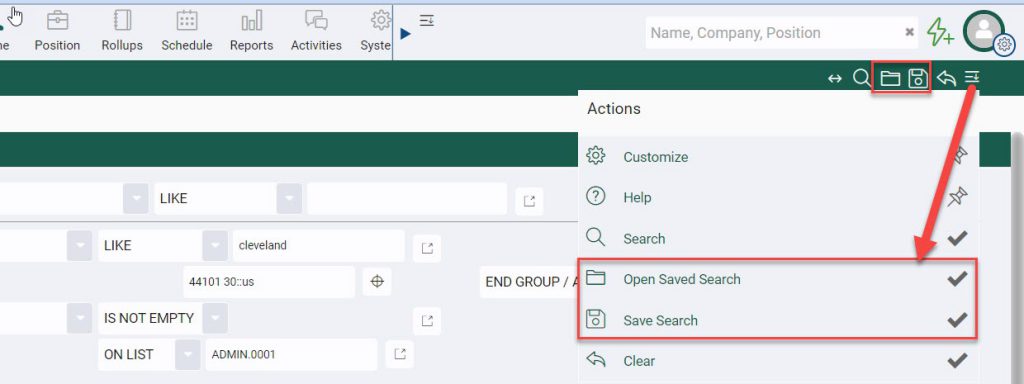
The “Save Search” feature this saves the search query criteria for future searches. If you want to save the results of a search, put the resulting Name, Company, or Position records on a Rollup List.
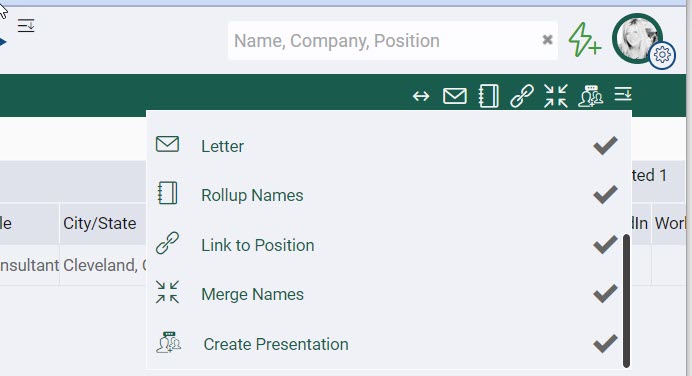
While viewing the results, you can also select records to perform actions such as rolling them up into a list, mass emailing, or linking to a position. These choices all appear in the Action menu at the top.
Advanced Search Examples #
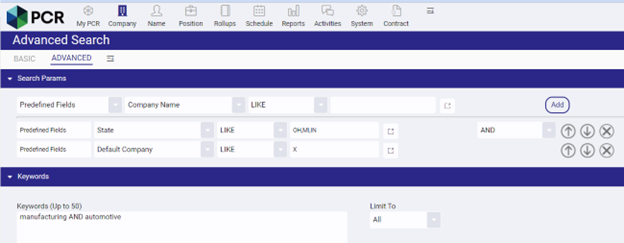
Company Advanced Search #
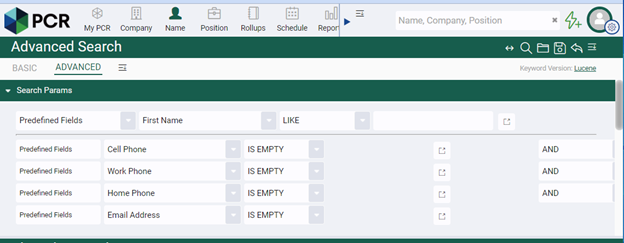
Name Advanced Search #


Position Advanced Search #
