Once you have entered a new Name Record or located an existing Name Record via the Gmail plugin, you can now interact with the record without leaving Gmail.
Note: You will still need to access PCRecruiter through your usual methods for some advanced features.
Name Details #

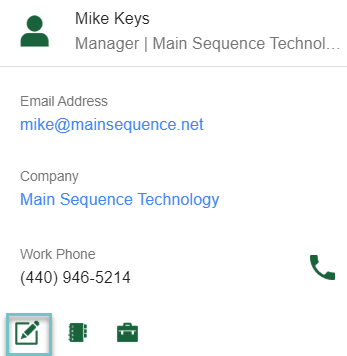
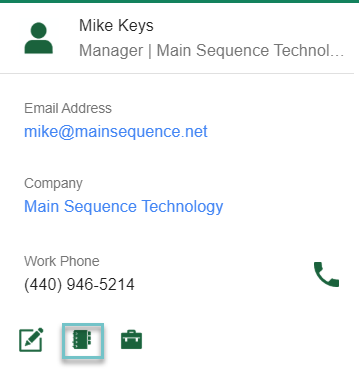
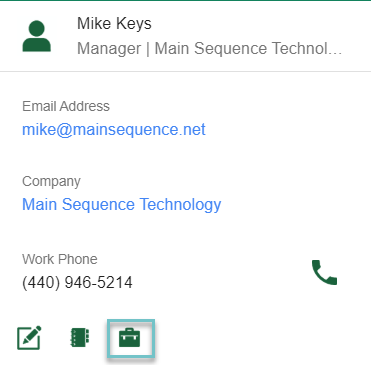
When viewing a Name Record in the PCR Pane you will see the fields you have populated on their record. Only the fields that are populated will display here, you will not see blank fields.
Detail Fields #
By default the following fields will be displayed with adding and viewing name records:
- First Name
- Last Name
- Title
- Company Name
- Home, Work and Cell Phone
- Social Network Links
- City
- State
- Postal Code
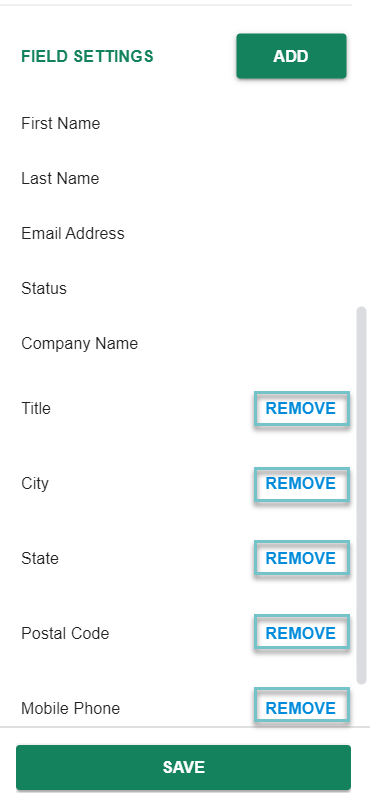
You can customize these fields via the settings area:
- Click the three dots to open the PCR Add-On Menu
- Click Settings
- Scroll to Field Settings
- Click Remove for any fields you wish to remove from your view (Note: You cannot remove First Name, Last Name, Email Address, Status or Company Name)
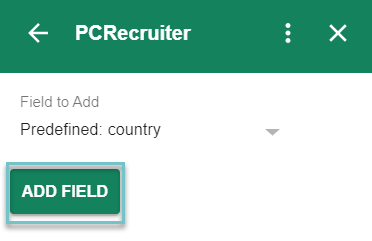
- To add additional fields click Add
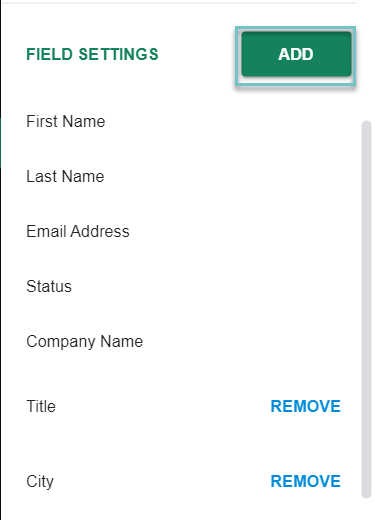
- Use the dropdown to choose the field you would like to add (You can choose from Predefined and Custom Fields)
- Click Add Field (The selected field will be added to the bottom of your current layout)
- Click Save – You will now see the field when adding/editing a name or working with a record that has the field populated
Note: If you are a Google Voice user you will be able to dial out via the phone icon to the right of a phone number.
Editing a Record #
- To edit a record, select the Edit icon below their details
- Once you have completed editing, be sure to click Save.
Rollup Lists #
From the PCRecruiter Pane you can add a name to a Rollup List and view any Rollup Lists that person is already on.
- Click the Rollup icon
- Type the first few letters of your Rollup List Name
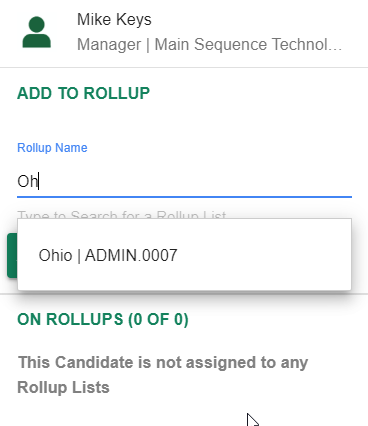
- The list will be displayed as a Search Result
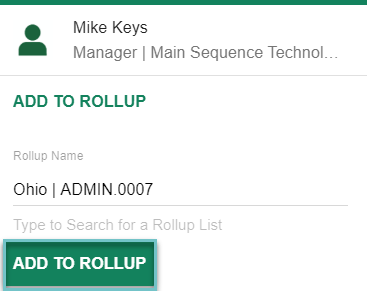
- Select the List
- Click Add to Rollup
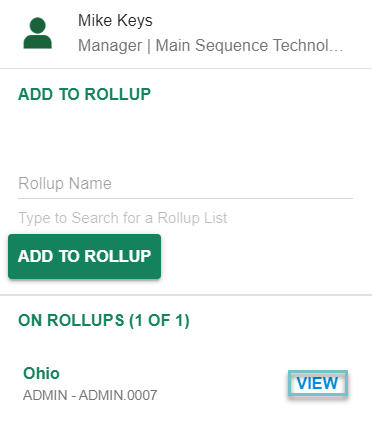
- You will now see the Rollup list displayed below
- Clicking View will jump you to the full Rollup List in PCR.
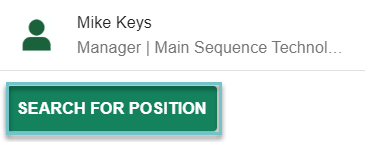
Positions #
You can also link Candidate’s to Positions and view Positions they are currently linked to.
- Click the Positions Icon
- Click Search for Position
- Enter your Search Criteria
- Click Search, the results will display below your search entry
- Click LINK for the position you wish to link them to
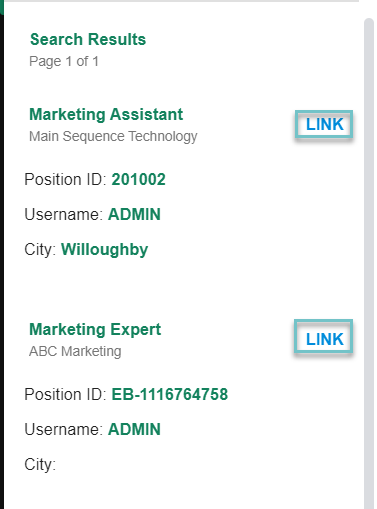
- Now, you are able to see the Name has been Linked as well as any other positions they are linked to. You can also see the Interview Type and Status they are currently in for each position.
Attachments #
The Attachments Section allows users to Add an Attachment, Update the Resume, Create a Record, or View existing Attachments.
- Locate the Attachments Section
- Choose an Action Icon:
- Add Attachment: Shows a list of all attachments from the email you are viewing, choose all documents you would like to add to the records attachments area.
- Update Resume: Shows a list of all attachments from the email you are viewing, choose the file you would like to replace the current Resume With
- Create Candidate: Creates a brand new Name record from an attachment that has been sent (for instance if someone forwards you a resume)
- Click View PCR Attachments to see all of that records Attachments in PCR.
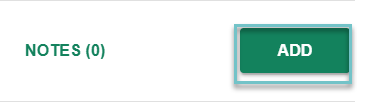
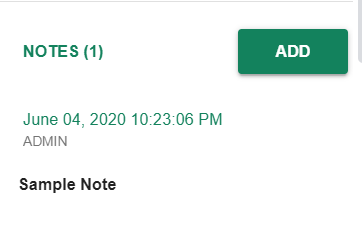
Notes #
The Notes section will allow you to view existing Notes for the Name as well as add new Notes.
- Locate the Notes Section
- Click Add
- Enter your Note
- Click Save
- View the Note in the PCR Pane
Note: The number of Notes displayed in the PCR Pane is configurable by clicking the three dots followed by Settings. Additional Notes can be viewed by clicking View More Notes…
Activities #
Lastly is the Activities section which will allow you to Add and View Activities
- Locate the Activities Section
- Click Add
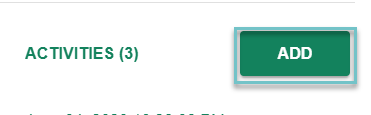
- Enter your Activity and Follow Up details as if you were from the usual Add Activity Screen
- Click Submit when finished
- View Activity history from the PCR Pane
Note: The number of Activities displayed in the PCR Pane is configurable by clicking the three dots followed by Settings. Additional Activities can be viewed by clicking View More Activities…