The PCR Capture browser plugin for Chrome / Edge extends the functionality of PCRecruiter, helping users import new candidates and clients, as well as update and merge data into existing records.
Before installing PCR Capture, please uninstall any older releases by opening “Extensions” in the three-dot menu on your browser or by opening chrome://extensions/ in your URL bar. The legacy PCR Capture edition is represented by a blue and green hexagon. If the legacy edition or any beta versions exist, click Remove before installing the current release. Having multiple editions installed will introduce conflicts and prevent use of the product. Once the current Extension is installed, it will update automatically as new versions are released.
- Download the PCR Capture Extension here.
- Click the ‘Add to Chrome’ button.
- Use the Extensions icon in the upper right corner of Chrome to pin the PCR Capture extension.
- Once the extension is pinned, click on the PCR Capture extension to configure.
- Enter your PCRecruiter login URL. This will be the URL you use to get to your PCR login screen.
https://www2.pcrecruiter.net/pcr.asp?uid=odbc.MyCompany
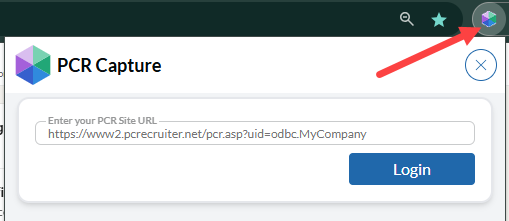
- Click Login
- After entering a URL, you’ll be given the option to enter your Username and Password and to select a database as you would when logging into the full PCRecruiter interface.
- Click ‘Log In’
Capture Configuration #
After logging in, you will then be presented with the main PCR Capture configuration panel:
Capture Tab: Here you will find the list of sites where the plugin is avilable to Capture contact data from. Use the toggle to turn them on or off.
Match Tab: Here you will find the list of sites where the plugin will attempt to Match first/last name combinations on. Use the toggle to turn them on or off.
Basic Mode (Not recommended): In Basic Mode, PCR Capture will add the captured information to the database with NO review and NO duplicate check. This is helpful for rapid database building and speed, but reduces the overall quality of the database if no post-import review is done.
Dark Mode: Inverts the interface colors for low-light situations.
Capture to Default Company: Allows for the default behavior of the tool to automatically add the captured record to the default company when toggled on. When this is toggled off the default behavior will add the company record as a new company record. Please note: The default Company toggle will be set to on automatically.

Log Out — Disconnects PCR Capture from the currently active database / user account indicated below it.
Configure Data Fields #
To reach this configuration screen, you must first browse to a web page that triggers the PCR Capture tool and begin capturing a record. Next, click on the pencil icon at the top right corner of the PCR Capture window will switch the screen into ‘Configure Captured Data’ mode. In this mode, you can select which fields and sections are presented on the Capture screen and in what order.
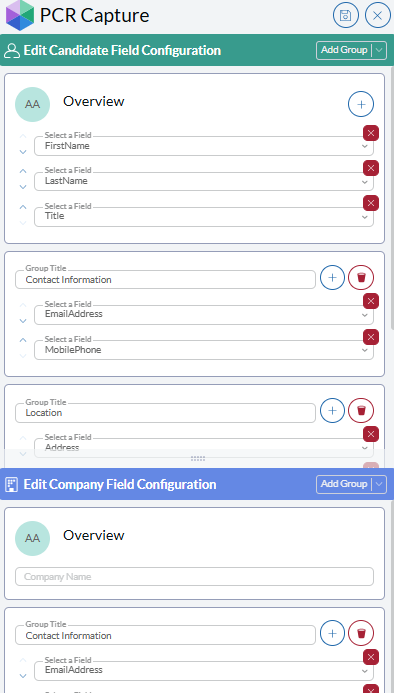
Please note: To reach this configuration screen, you must first browse to a web page that triggers the PCR Capture tool. The configuration options become available once you begin the capture process for a contact.
The “Overview” section of the Capture window contains the required fields. Fields in subsequent Groups are optional. The “Overview” fields are configurable only by admin-level database users, while all other fields are configured individually by each user.
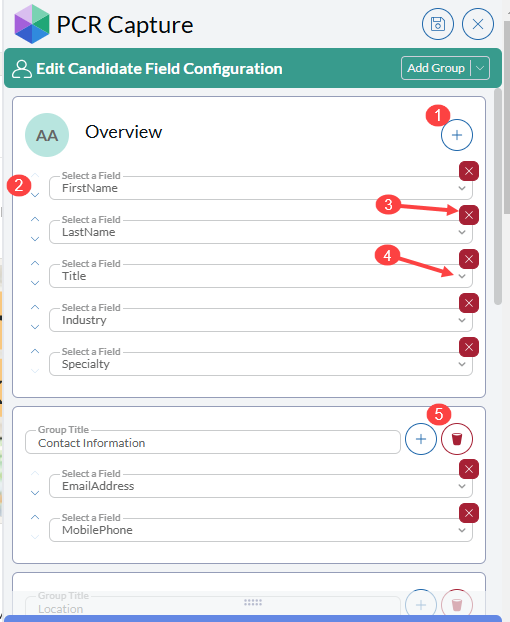
- The + next to the ‘Overview’ heading, visible only to admin-level users, will add new fields to the required section at the top of the Capture field list. Changes to the ‘Overview’ fields will be automatically synced to all other Capture users sharing this database.
- The ^/v arrows to the left of each field are used for changing the field order.
- The x to the right of a field removes it from the layout.
- The v dropdown at the right of each field allows you to select which field from the record is used in that space.
- Within a Group, use the + to add a new field or the “Trash” to delete the entire Group.
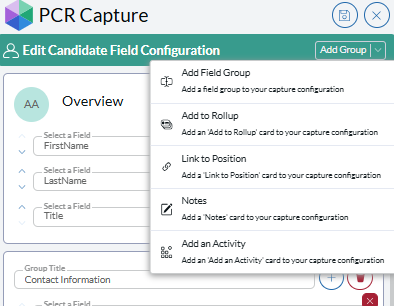
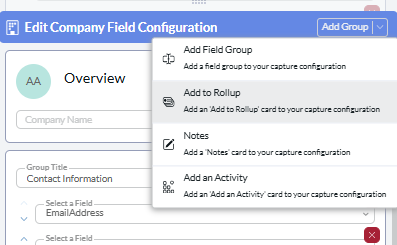
- The ‘Add Group’ button at the top right allows you to insert new Fields, as well as sections for performing additional actions and data entry while capturing. These special sections are:
- Add to Rollup: Allows user to select a Rollup to add the record to during the Capture process.
- If you wish to add captured contacts to the same Rollup for multiple records, click the ‘select a Rollup’ box while in edit mode. Recently viewed lists will appear after clicking but you can search for any list by the name or code to make it your ‘default’ Rollup when Capturing records.
- The selected Rollup will be automatically used unless you override it by removing the Rollup name at the time of capture.
- To remove this Rollup as the default, clear the Rollup list from the field while in edit mode.
- If no default Rollup is selected, you may pick a list to add the contact to each time you capture.
- Link to Position (Candidate only): Allows user to select a Position to link the record to during the Capture process.
- If you wish to add captured contacts to the same Position pipeline regularly, click in the ‘Select a Position’ box. Recently viewed jobs will appear automatically before you begin typing, which you may select from without searching. You may enter a job title, company, city, state, or position ID to make it your ‘default’ position.
- The selected Position will be automatically used unless you override it by removing the name of the Position at the time of capture.
- To remove this Position as the default, clear the Rollup list from the field while in edit mode.
- If no default Position is selected, you will pick a job to add the contact to each time you capture.
- Add Note: Allows user to add a note the record to during the Capture process.
- Add Activity: Allows user to add an activity the record to during the Capture process. Please note that this will be added in addition to the system generated activity.
- Add to Rollup: Allows user to select a Rollup to add the record to during the Capture process.
Click the Save button or the Save Configuration icon to store your edited selections.
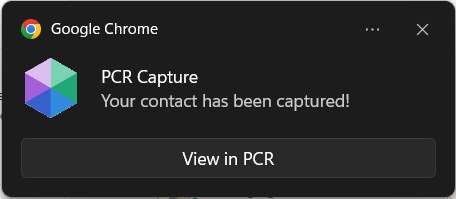
Notifications #
The “Jump To Record” notification that appears following a successful capture relies on your operating system’s built-in popup function. If you are not seeing notifications following a capture, you may need to check these settings.
Windows 11 Settings #
- Open Windows Settings by searching for “Settings” from your computer’s Start Menu or task bar.
- Select System
- On the left, select Notifications & Actions.
- On the right, make sure the toggle is on for “Get notifications from apps and other senders”
- On the right, scroll down and select your browser (i.e. Google Chrome)
- Make sure Notifications are turned on and ‘Show notification banners’ is checked
Chrome Settings #
To enable pop-ups on Chrome for all websites, follow these steps:
- Open Chrome.
- In the Chrome menu, select Preferences.
- Click the Privacy & Security tab and click the Site Settings button.
- Open the Content section and select the Pop-ups and redirects option.
- Set the Default behavior option to Sites that can send pop-ups and use redirects.
If you wish to enable the popup only on specific sites:
- Open Chrome.
- Go to the website you wish to enable popups from.
- Click on the Lock icon in the upper left corner of the web page.
- In the drop-down menu, click the Site Settings button.
- Set the Pop-ups and redirects option to Allow.