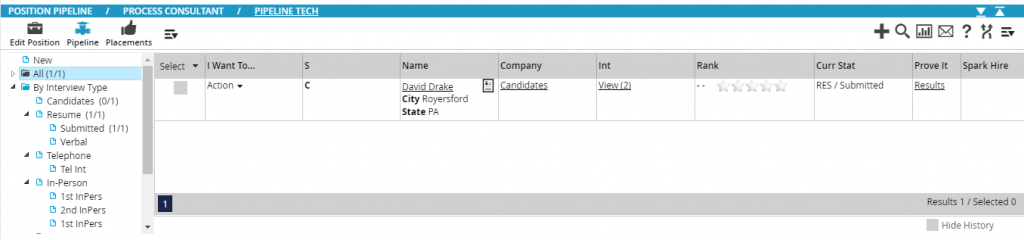
When going to a position’s pipeline it can be modified in different ways to help the user see more or less information regarding their interviews. These settings are applicable to an individual user but can also be copied over to others. To customize this area follow the steps below.
- Go to a position record and click on the pipeline icon from the navigation toolbar on the left.
- Now select Customize from the action toolbar on the right.
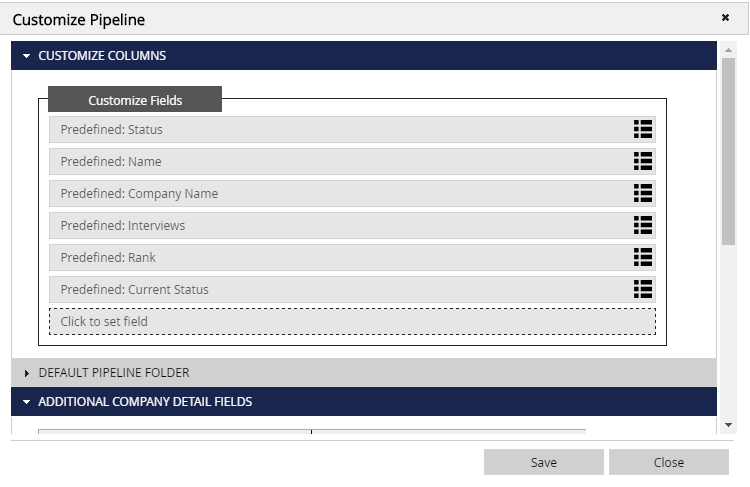
- Customize Columns: You can change the columns that display candidate information in the pipeline. Beneath Customize Fields click the dropdown where it says Select a Field Name to choose which fields you want displayed across the pipeline screen.
- Default Pipeline Folder: By clicking this dropdown and selecting one of these Interview Types when you enter a position’s pipeline this will be the default selected folder that you will be viewing.
- Additional Company Detail Fields: By clicking the plus sign corresponding with the fields on the left will show more information about a candidate’s company in the Company column in the pipeline.
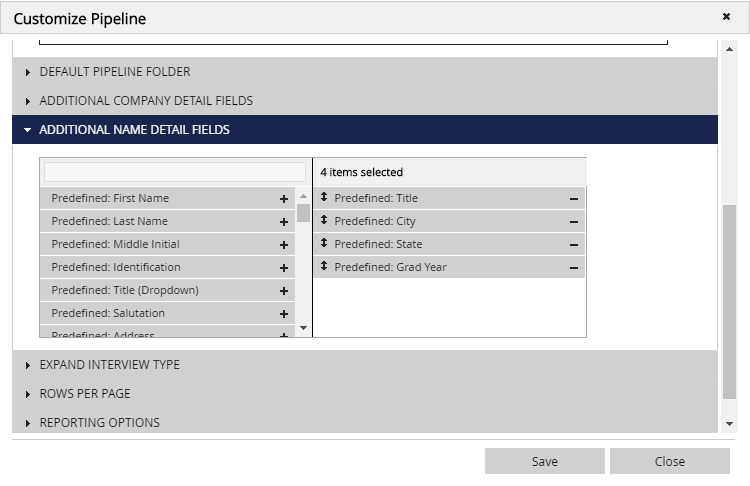
- Additional Name Detail Fields: By clicking the plus sign corresponding with the fields on the left will show more information about the candidate in the Name column in the pipeline.
- Expand Interview Type: By placing check marks in the boxes will automatically expand those Interview Types to reveal the Interview Statuses when you first enter a position’s pipeline (on the left side of the display).
- Rows Per Page: This displays the total amount of candidates that can be viewed on the pipeline screen at one time. The default setting for this is 20 but can be increased up to 100 candidates per page.
- Reporting Options: This will allow you to activate and run our Applicant Tracking Report as well as other Custom Interview and Applicant Tracking reports that you create.
- Remove Layout: This will remove all of the customization that you have applied above and set you back to the default settings.
- Customize Columns: You can change the columns that display candidate information in the pipeline. Beneath Customize Fields click the dropdown where it says Select a Field Name to choose which fields you want displayed across the pipeline screen.
- Click Save at the bottom to save your custom settings and refresh your pipeline to see these changes.